Every knob, switch and shape on the panel, in the order it sits there. What each one does — not what to set it to.
Top row
The four switches above everything
 Aura · max aura · dark · bypass
Aura
Switch · on when you open it
Things sit better. What was crowding gets out of the way, what was hiding comes forward, and the record breathes without sounding like anything was done to it.
We are not going to tell you how. Do it over a mix you know well — that is the only explanation that has ever landed.
Max Aura
Switch · off · hidden while AURA is off
The same, turned all the way up. More of everything AURA already does to whatever it touches.
You will know within a bar whether a track wants it.
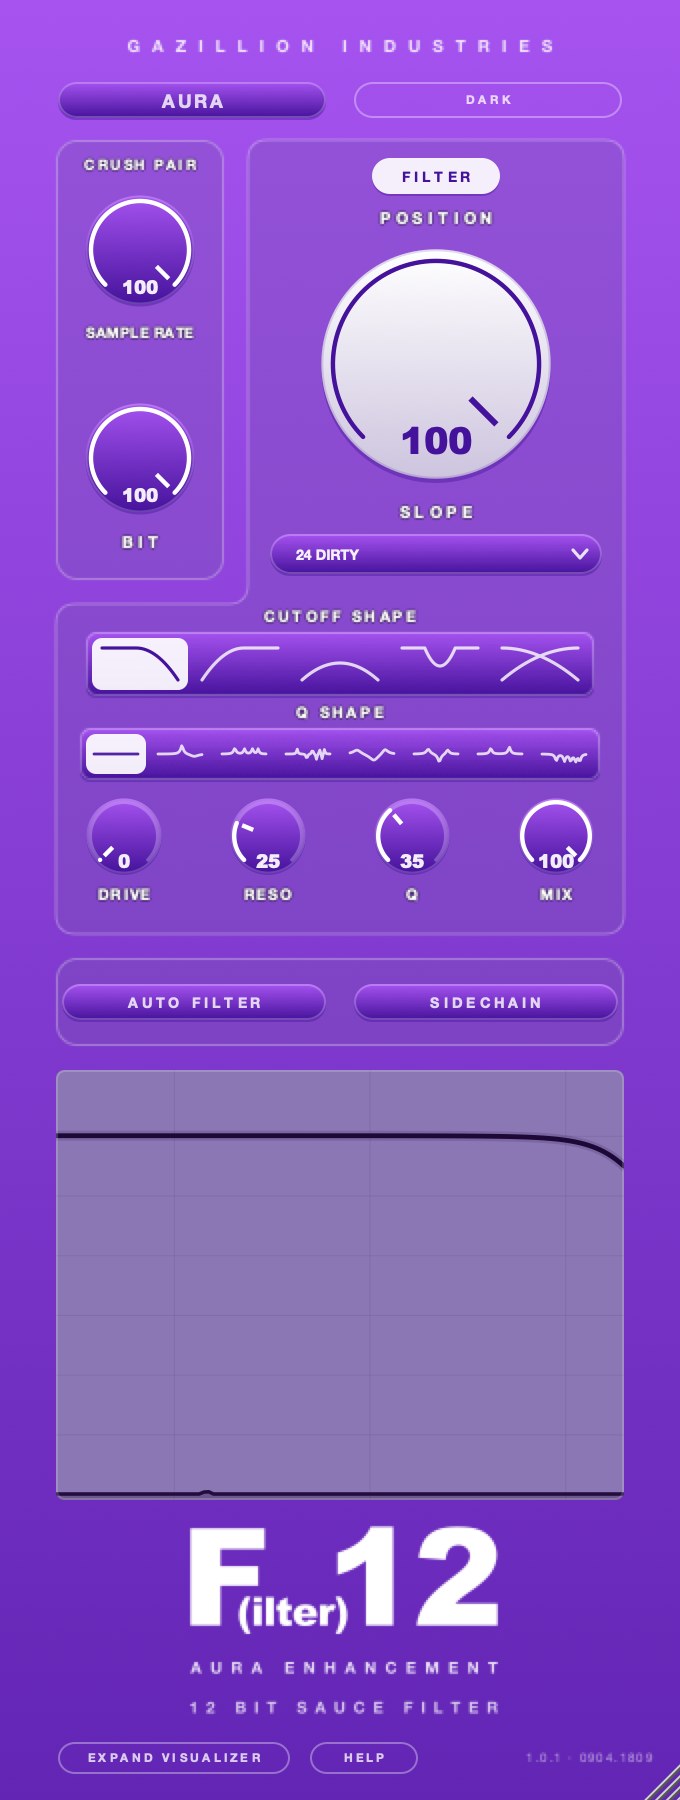 Aura off — no field, and the row is three switches wide
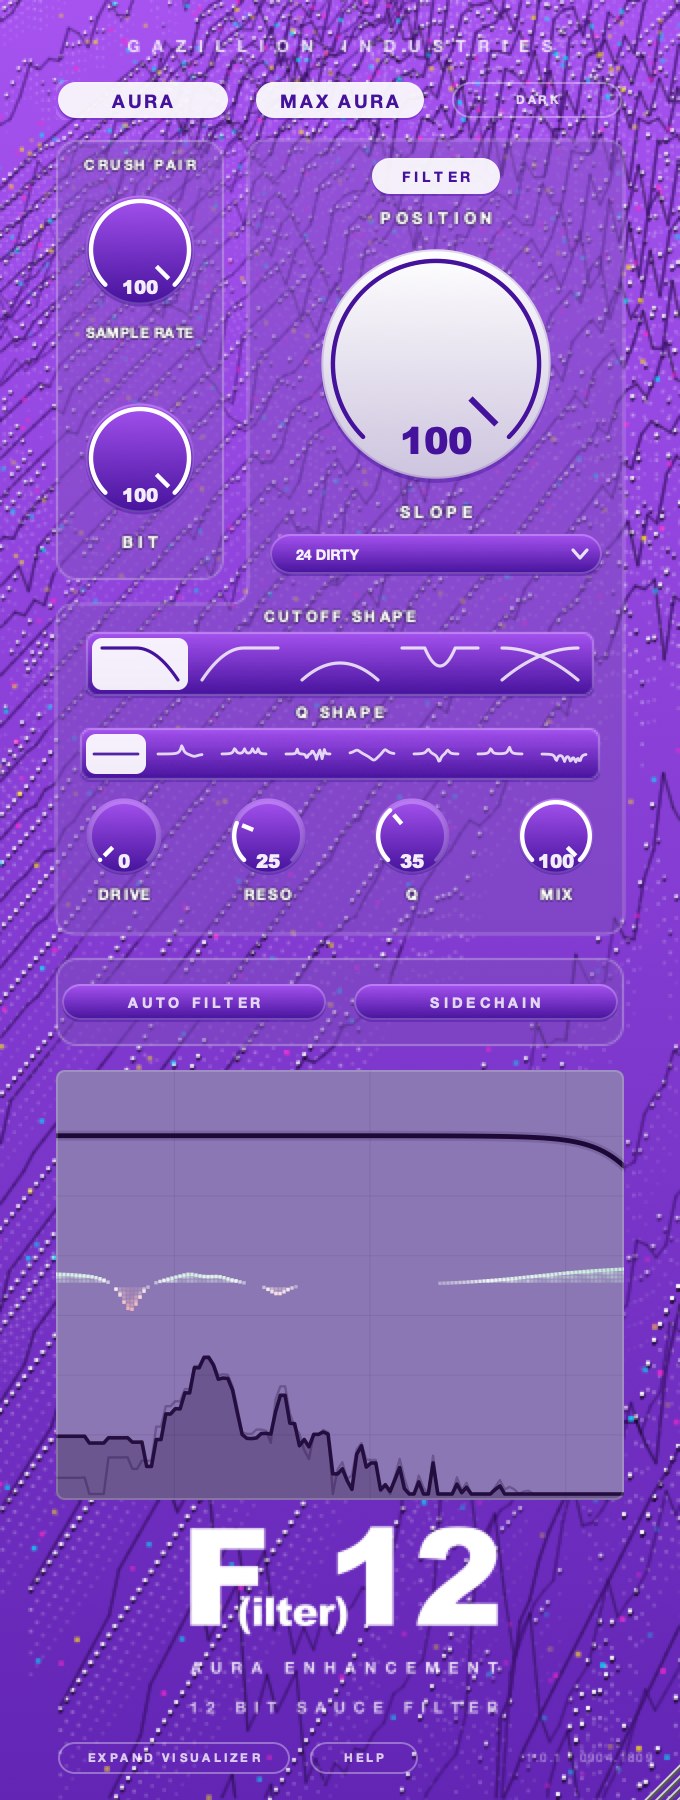 Max aura
Swaps the panel between its dark colorway, which it opens in, and the light one. Appearance only, and it saves with the session, so a project opens the way you left it.
Takes the whole plug-in out. The panel goes gray and the display goes empty, so there is no doubting it is off.
It fades over 20 ms rather than cutting, so flipping it while the track plays does not click. It saves with the session like everything else.
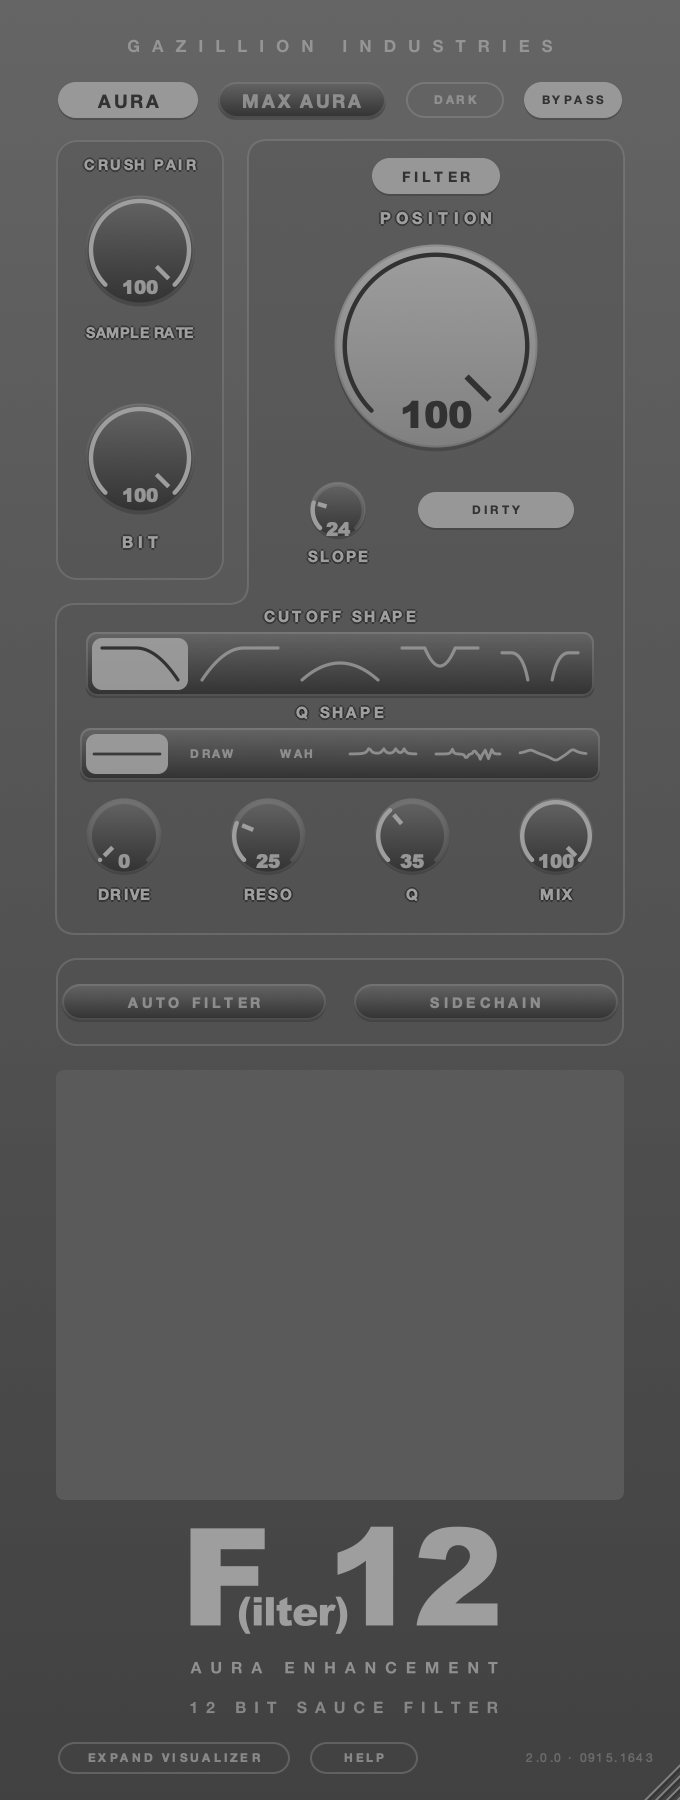 Bypassed
Left column
Crush pair
Both read as the thing they name — up is a higher rate and more bits — so turning down is what destroys.
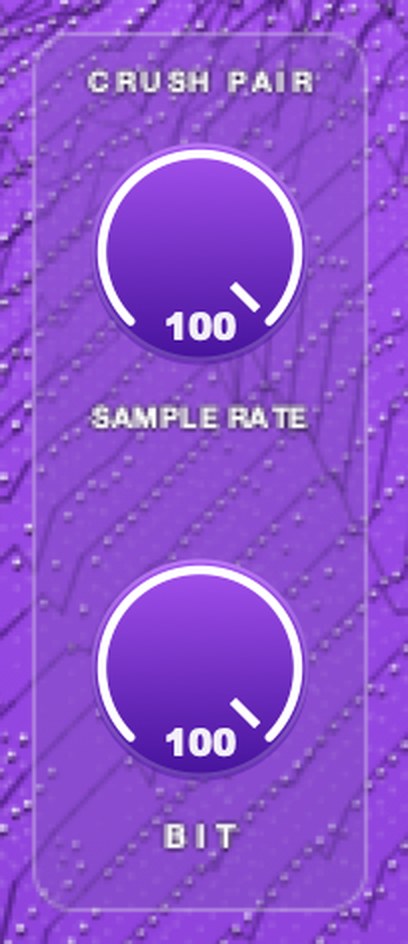 Sample rate over bit
Sample Rate
0 – 100 % · 100
Slows the rate the audio is sampled at.
The top goes, and what was up there folds back down into the audible range as new content. The fold is the point — it is what separates this from taking the top off with the filter, and why the two do not stack into the same result.
Coarsens the steps the audio is measured in.
It works on the size of the steps rather than on level, so it shows itself in tails and in the quiet material between hits. That is where the pair pulls apart: rate reshapes the top, bit reshapes the floor.
Twelve bits is as clean as this gets. It only goes down from there.
Nothing in the plug-in uses lookahead and there is no latency anywhere in it, so none of this costs you delay compensation.
The L-shaped group
Filter
The centerpiece. Its group wraps around the crush pair to take in the two rows of pictures, because those belong to it.
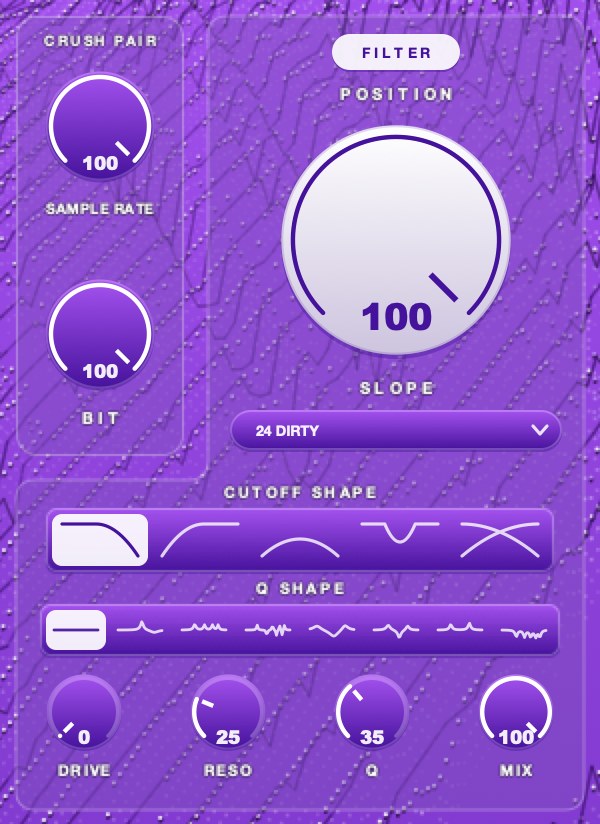 The whole filter group
Takes the whole filter out of the way, so you can hear what it was doing without losing where you had it set.
Position
0 – 100 % · 100 · the big dial
Where in the spectrum the filter sits.
The further it works, the more it drives and the more it sings, without you adding anything to make that happen.
It is also the anchor for the Q SHAPE row — those peaks and dips sit at ratios of wherever this knob is, so the whole formation travels with it.
This is the knob you will spend the most time with, and the first place to look when you want to automate the filter in your DAW.
Cutoff Shape
5 tiles · low-pass
Low-pass, high-pass, band-pass, notch, morph — each drawn as its own response curve.
 Left to right, as they sit
MORPH is the one that is not obvious. It runs one knob from a closing low-pass, through untouched, to an opening high-pass — so on morph the middle of POSITION's travel is the neutral place, and the two halves go opposite ways. The resonance grows toward both ends with it, so the extremes sing and the middle stays out of the way. On the other four the knob sweeps a corner and the ends are the extremes.
Slope
18 – 144 dB/oct · 24
How hard the filter falls away past the corner. Gentle at the bottom of the knob, a wall at the top.
All the way up, almost nothing gets past, and the corner is rounded off rather than square. It is a knob, not a list, so turning it while something plays sweeps the line smoothly from one steepness to the next.
Sessions saved at 12 dB per octave in 1.0 open at 18, the gentlest it goes now.
Feeds the filter's own distortion back through itself. Off, the same filter runs clean.
SLOPE, DIRTY and Q SHAPE are separate controls, so a steep dirty filter can also be a wah. It opens dirty. There is no neutral starting point here on purpose.
Resonant nodes riding on top of the filter, placed at ratios of the cutoff so the whole formation sweeps with POSITION rather than staying nailed to a frequency.
 Six, in the order they sit
- Plain no nodes. The filter's own resonance and nothing added.
- Draw your own, drawn on the display. It has its own entry below.
- Wah one strong peak right at the cutoff, with a shallow dip just over an octave above it. The body underneath stays — a boost, so the lows do not leave when you sweep it.
- Vowel four peaks spaced the way a formant table spaces them.
- Comb peaks and nulls alternating on even spacing, seven of them across the range.
- Scoop a smile. Both ends lifted and the cutoff itself pulled down between them.
Every node in the built-in shapes sits between roughly a third of the cutoff and just under three times it. Further out than that and a node lands in the filter's own stopband, where the shape stops being audible at all.
This row and the cutoff row are independent. Any of the six sits on any of the five.
HOLLOW, TWIN and PHASER were retired in 2.0. A session that used one opens in DRAW, holding that exact shape.
Draw
Q SHAPE · up to 7 points
Your own Q shape. Pick DRAW and the display is where you draw it, starting from the shape you were on.
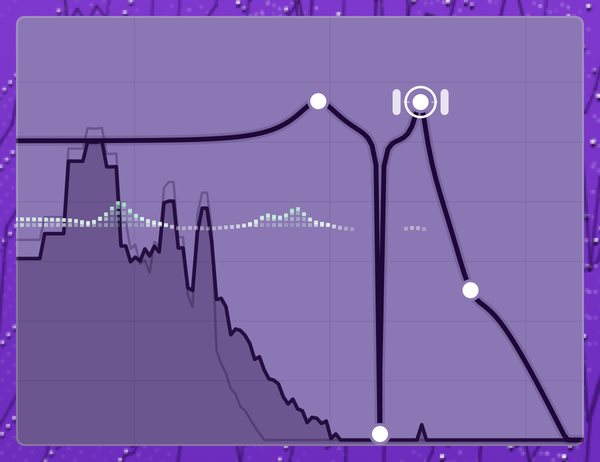 Four points, one selected with its handles out
- Click empty space to add a point, and drag it anywhere. All the way down takes that frequency out; all the way up is +24 dB.
- Handles click a point and pull the handles either side of it for its width. Scrolling over a point does the same: up narrows, down widens.
- Right-click a point for bell, notch, low shelf, high shelf, low cut or high cut, or to delete it. Double-click deletes it too.
The points sit at ratios of the cutoff like every other shape, so they ride POSITION, the auto filter and the sidechain. It works the same on the panel and in the pop-out.
Drive, Reso, Q, Mix
The four small dials
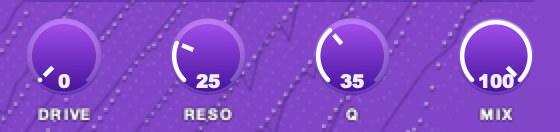 Drive · reso · q · mix
- Drive how hard the signal is pushed into the filter's own saturation. The gain comes back off afterwards, so driving it is character rather than volume. It works wherever the filter is running, and does nothing with FILTER off. 0 to 18 dB, opens at 0.
- Reso how hard it sings. 0 to 100 %, opens at 25.
- Q how narrow that singing is, and how tight the Q SHAPE nodes sit with it. It drives a peaking section right at the corner, so it is audible on every shape including PLAIN. 0 to 100 %, opens at 35.
- Mix how much of the whole thing you keep against what went in untouched. 0 to 100 %, opens at 100.
DRIVE belongs to the filter, not the crush. It pushes the filter's own saturation, so the crush pair stays just SAMPLE RATE and BIT.
RESO and Q are the pair to learn together. A wah at low Q is a broad sweep; the same wah at high Q is a point.
RESO scales the filter's whole resonance behavior rather than setting one fixed value, so the character holds across the sweep instead of drifting as POSITION moves.
The group that grows
Movement
Two ways to hand the filter to something other than your hand. Neither is on when you open the plug-in.
One mover at a time. Engaging either switch releases the other. Both driving the same cutoff would mean neither knob does what it says.
Hands the filter to your song's clock.
Locked to the arrangement rather than free-running: it moves only while the transport moves, it stops and returns to the start when you stop, and the sweep lands in the same place in the bar wherever you drop the playhead. On every shape but RANDOM, bar 9 looks like bar 1 and the same eight bars bounce the same way twice.
RANDOM is the exception, and worth knowing before you print. It draws a fresh value every time the cycle turns over, and that draw does not reset with the transport — so it does not repeat from take to take. Commit it to audio when you get one you like.
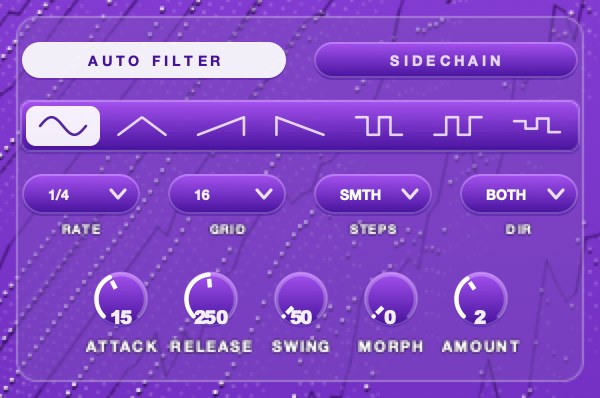 Auto filter, open
Hands the filter to a signal instead of a clock.
Same shapes, different driver. Here the shape is a path rather than a cycle: the follower walks it from rest to fully engaged and back, so a ramp is plain travel, a triangle pumps up and back, and a square gates.
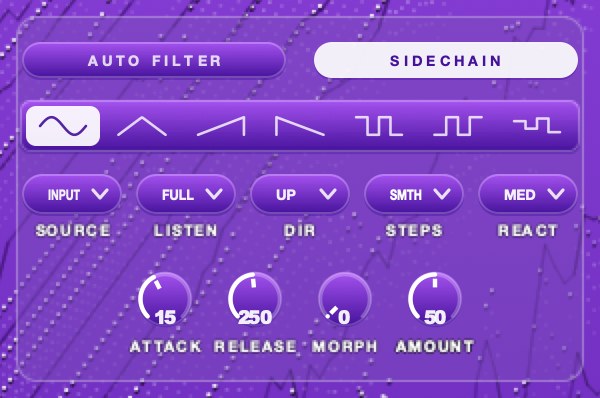 Sidechain, open — a different row of choices, the same shapes
Shapes
7 tiles · sine · shared
The shape the filter opens and closes in, drawn rather than named.
Two pairs are worth separating. The ramps differ in which end snaps — RAMP UP climbs then snaps shut, RAMP DOWN snaps open then falls away — and the vertical edge in the drawing is the snap. The two squares differ only in which state they start in. The rest are what they look like, except that the triangle rises first.
Steps
Smooth, 2, 3, 4, 6, 8, 16 · smooth · shared
Cuts the shape into a stair instead of a slide. Smooth reads as SMTH in the box.
Morph
0 – 100 % · 0 · shared
Bends one shape into the next.
At 0 you get the shape you picked; turning it up walks it toward its neighbor. The seven tiles are points on a continuum, not seven fixed settings.
Attack & Release
0.5 – 200 ms · 15 / 5 – 2000 ms · 250 · shared
How quickly the filter travels once something is moving it, and how quickly it comes back.
They shape the filter's travel under either mover. How eagerly the follower itself decides to move is a separate thing, and that is REACT.
Auto filter only
The clock's own controls
The division the cycle runs at.
4 bars down to 1/16 straight, plus 1/4 and 1/8 dotted, and 1/4, 1/8 and 1/16 triplet. It reads the host's tempo, so it follows a tempo change rather than needing to be reset.
Grid
16th, 8th, quint · 16th
Which notes SWING pairs up before it stretches them.
16TH and 8TH do nothing until SWING is off 50. QUINT does not work that way — it is a fixed three-against-two and ignores the SWING knob entirely, so it is the one setting here that changes the feel on its own.
Pushes the cycle off the grid. 50 is straight, on 16TH and 8TH — QUINT sets its own ratio and this knob stops applying.
The clock itself stays exact underneath — the timing is displaced deliberately rather than allowed to drift.
Where in the shape each cycle starts.
It slides the shape along the bar without changing its rate, and the sweep stays locked to the arrangement wherever you set it.
The sweep
Drawn · under the boxes
A picture of the move all of these make together, and a dot where the song is.
It shows one bar, or one whole cycle when a cycle runs longer than a bar, with the beats marked faintly so SWING and PHASE can be read against them. Nothing on it is a control.
Sends the sweep up from the filter, down from it, or both ways.
POSITION is the origin. On UP the knob is the floor of the sweep, on DOWN the ceiling, on BOTH the center — so switching this moves where the same setting sits without you touching the big dial.
Amount
0 – 4 octaves · 1.5
How far the sweep travels from where POSITION is sitting.
Measured in octaves, so the same setting is the same musical distance wherever on the dial you are working.
Every dial on the panel prints whole numbers, and this is the only one that opens on a fraction — so it reads 2 while it is sitting at 1.5, and a nudge or two will not change what it says.
Sidechain only
The follower's own controls
Source
Input, sidechain · input
What the follower listens to.
- Input the material itself. An envelope filter with nothing to route.
- Sidechain the external bus.
Which track feeds that bus is chosen in your DAW. No plug-in can see the host's routing, so that end of it is always the host's job.
Listen
Full, lows, mids, highs · full
Narrows what the follower hears to a band of the source.
It changes what drives the filter and never what you hear — nothing on this row is in the audio path. On INPUT it is the useful one: LOWS gives you kick-driven motion off the material itself, without setting up a send.
Which way the filter travels as the source gets louder.
- Up a louder source pushes the filter open. The envelope-filter move.
- Down a louder source pulls it shut. The pump.
React
Low, med, high · med
How eagerly the follower makes up its mind.
Three settings and no milliseconds — it is a feel. The milliseconds are ATTACK and RELEASE.
How far the follower moves the filter.
The two movers name this the same thing and measure it differently: the clock's AMOUNT is in octaves, the follower's is a percentage.
Bottom of the panel
The display
Deliberately unlabeled. It is there to be watched while you work, not read.
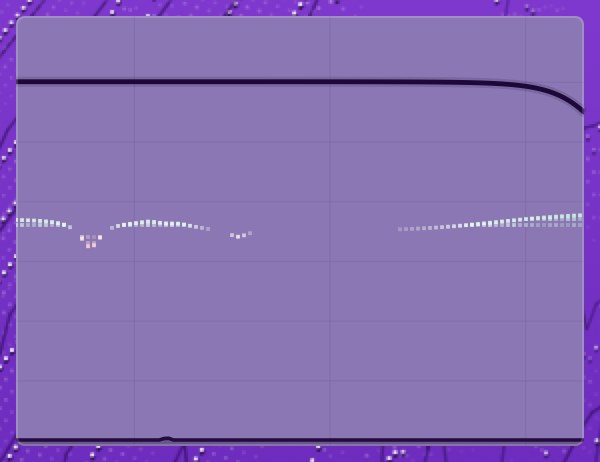 The display on the panel
Reading it
The heavy line is the filter. Behind it is what is going in and what is coming out.
The field of pixels is AURA: green where it is adding, red where it is taking away, and nothing at all where it has no opinion. That last part is the one to watch — an empty stretch is the plug-in telling you it left that band alone.
AURA lives inside the filter, so past the cutoff there is no field at all. In DRAW, this is also where you draw.
Anything on this panel that is not affecting the sound is not on screen, so with nothing playing there is nothing drawn.
Expand Visualizer
Switch · bottom left
The same plot in its own window — 720 by 420, centered, and a fixed size.
Bigger than the strip on the panel, and with the scales printed on it: dB down the side, frequency along the bottom. For when you want to know exactly what is happening rather than feel it. The panel's own display steps aside while it is up, and DRAW works in the window the same as on the panel.
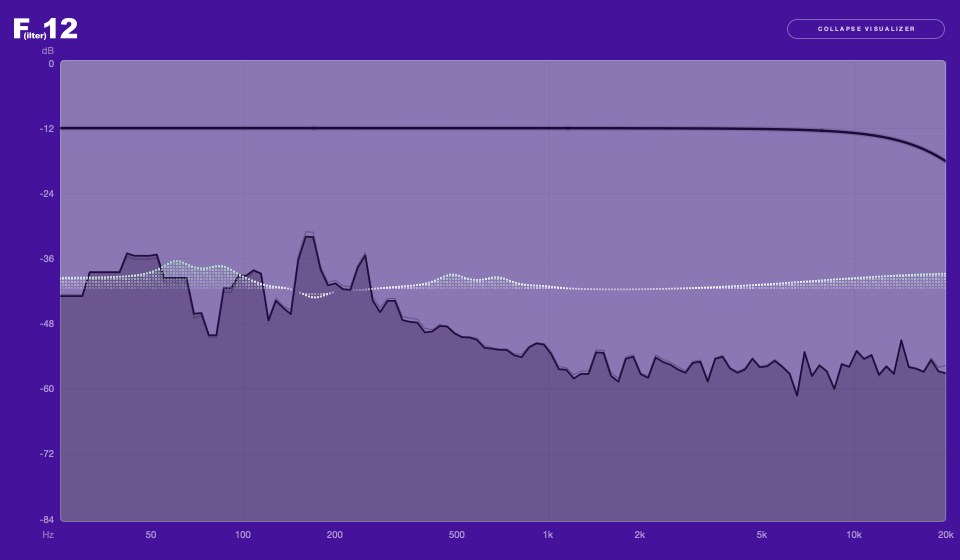 The pop-out, with both scales
Help
Switch · bottom, beside it
Brings the walkthrough back whenever you want it.
It runs itself the first time the plug-in is opened on a machine, once it is activated, and says the same things this page does, a step at a time, pointed at the control it is talking about.
 The foot