← Gazillion Industries/Reading material
Best auto filter plugins
Gazillion Industries ·
The loop is good for four bars. By the second pass you already know
what every hit is going to do, and by the eighth you are reaching for the fader. Nothing
is wrong with the parts. Nothing in them moves.
The best auto filter plugin is the one whose resonance stays musical at the top of its
range and whose cutoff can be driven by the incoming signal, not only by an LFO. Look for
low-pass, band-pass and high-pass shapes, tempo-synced movement with swing and phase, an
envelope follower you can set, and a wet/dry control.
F(ilter)12 carries
every one of those for $49, and it is the plug-in worked through below. Then the mechanism, a
ten-minute test, and the other options people name.
The short version
- What it is
- a filter whose cutoff is moved for you
- LFO mode
- repeating movement locked to note values
- Envelope mode
- movement that follows the input level
- What decides quality
- resonance at the top, and a real envelope follower
- What to use
- F(ilter)12, $49 — clock or signal on one cutoff, six resonance shapes, crush in front
- Free route
- your DAW's stock auto filter, then Kilohearts or MeldaProduction, neither of which modulates on its own
- Paid route
- routing, drive, several modulators, mid/side
Hear the filter move
Filter writing is almost entirely adjectives. Here is one loop through F(ilter)12 at three POSITION
settings and then swept, so the words above can be checked against the thing itself.
Open — filter 100, nothing removed
Filter 60 — peak falls to −8.49 dBFS
Filter 30 — peak falls to −13.68 dBFS
Swept — the gesture rather than the setting
One source loop, rendered offline through the same engine
F(ilter)12 runs, no other
processing. The peak figures are the renderer's own readout.
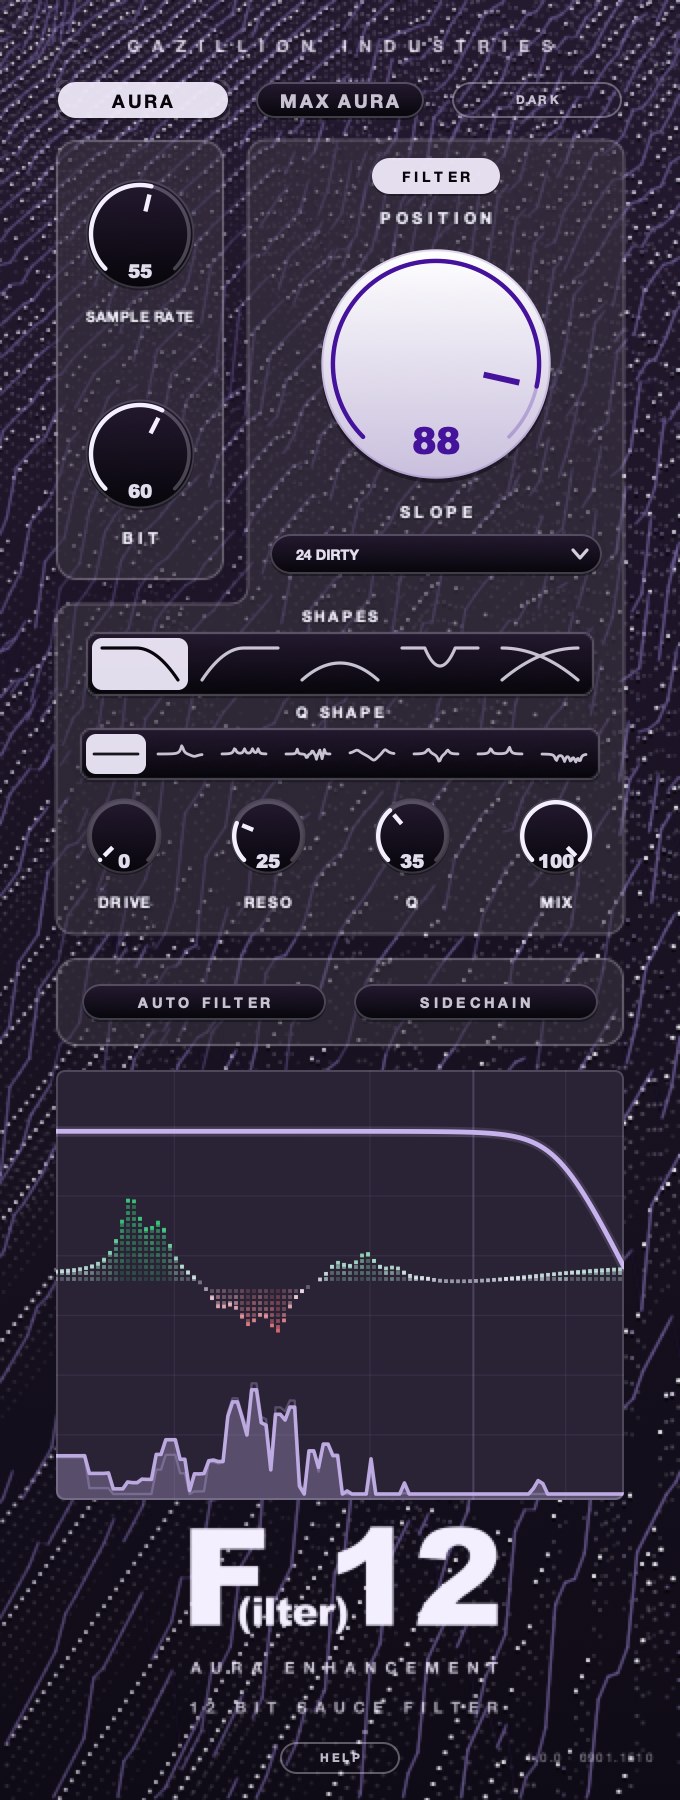 One filter, one slope, one mix. The moving parts live under AUTO FILTER and SIDECHAIN.
What an auto filter plugin actually does
A filter removes energy on one side of a corner frequency. A low-pass keeps what is
below the corner and sheds what is above it; a high-pass does the reverse; a band-pass keeps
a window and drops both ends. The corner is conventionally the frequency where the signal
has fallen by 3 dB, not the frequency where it disappears.
Past that corner the fall is measured in decibels per octave. Each filter pole gives you
6 dB per octave, so a two-pole low-pass sheds 12 dB every time the frequency doubles, a
four-pole sheds 24 dB, and an eight-pole sheds 48 dB. At 12 dB per octave a hi-hat at 8 kHz
is still audible with the corner at 4 kHz. At 48 dB per octave it is gone.
Resonance is a boost at the corner itself. Raise it and a narrow peak grows where the
filter turns, which is what makes a sweep sound like a sweep rather than a slow fade. Push it
far enough and the filter self-oscillates: it generates a sine tone at the cutoff with no
input at all. Our longer piece on cutoff
and resonance works through what that peak does to a mix.
An auto filter is that filter with a modulation source wired to the cutoff. The source is
usually one of four things: a low-frequency oscillator, an envelope follower reading the input,
a step sequencer, or a random generator. The plugin's job is to move the corner smoothly, at a
rate you can lock to the song, by an amount you can set.
How an LFO drives it
An LFO is an oscillator running below hearing, typically from a fraction of a hertz up to
20 Hz or so, whose output is a control value rather than a sound. A sine sweeps up and down
evenly. A triangle is the same movement with straight sides. A square jumps between two cutoffs
with nothing in between. A sawtooth falls slowly and snaps back. Sample-and-hold picks a new
random cutoff on every tick and stays there.
The rate is set either in hertz or in note divisions, and note divisions are what you want
nine times out of ten. At 120 BPM a quarter note lasts 500 ms, an eighth 250 ms, a sixteenth
125 ms. Set the LFO to a bar and the sweep takes 2 seconds; set it to a sixteenth and it
flutters. Phase decides where in the shape each cycle begins, which is the difference between
the filter opening on the downbeat and opening on the offbeat.
How an envelope follower drives it
An envelope follower turns level into a control signal. It rectifies the incoming audio,
smooths it with an attack time and a release time, and hands the result to the cutoff. Set the
attack short and the filter snaps open on the front of a snare. Set the release long and it
stays open through the tail. Depth sets how far it travels; direction sets whether louder
means brighter or darker.
This is the mode that makes a filter feel played rather than programmed. A bass line
through an envelope filter opens differently on every note because every note has a different
attack. A drum loop through one breathes on the kick. The same patch on a sustained pad does
almost nothing, because a pad has no transients to follow, which is the first thing worth
knowing before you buy anything.
How a sidechain input drives it
Point the envelope follower at a different track and the two parts start reacting to each
other. Feed it the kick and a pad ducks in brightness on every hit instead of ducking in level.
Feed it a vocal and the beat opens when the rapper comes in. It is the tonal cousin of
sidechain compression, and it survives a
loudness-maximized master better, because nothing about it depends on level.
Auto filter, envelope filter, filter sweep: three jobs, one plugin
People search for these as if they were three products. They are three uses of the same
mechanism, and the distinction matters when you are choosing, because a plugin can be excellent
at one and useless at the next.
An auto filter repeats. It is a cutoff on
a clock, running for as long as the part runs, and it is what you want for eight bars of
movement under a chord loop. Judge it on its sync: note divisions, swing, phase, and whether
the movement stays glued when the host tempo changes mid-song.
An envelope filter reacts. It has no clock at all, and its shape is whatever the performance
gives it. Guitar players call the same circuit an auto-wah. Judge it on its detector: attack and
release in milliseconds rather than a single vague "sensitivity" knob, a depth control that goes
both directions, and a sidechain input.
A filter sweep is a one-time move,
usually written as automation into a transition, and usually four or eight bars long. Judge a
plugin for this on parameter smoothing. A cutoff automated over eight bars is a slow ramp through
thousands of coefficient updates, and a plugin that recalculates only once per audio block will
step audibly where one that interpolates will glide.
Three jobs, and
F(ilter)12 does all three from
one cutoff. AUTO FILTER puts it on a clock with SWING and PHASE, SIDECHAIN hands it to a signal, or leave
both off and draw the sweep by hand. One at a time, on purpose — two sources on one cutoff and
neither knob does what it says.
What separates a good auto filter plugin from a bad one
Almost every filter sounds fine parked in the middle of its range at low resonance. The
differences show up at the edges, in movement, and under load. Here is what to listen for, in
the order that will cost you the most if you get it wrong.
Resonance at the top of its range
Turn the resonance to maximum and sweep the cutoff from bottom to top. A good filter keeps
the peak proportionate and keeps the body of the sound underneath it. A weak one gains 12 dB in
the peak and loses everything else, so the sweep turns into a whistle riding on nothing. If the
plugin offers resonance compensation, check what it costs you in character when you switch it
on: some designs trade the peak's bite for level stability. In F(ilter)12 the peak has a shape. RESO sets
how much, Q sets how narrow, and Q SHAPE puts further peaks and dips at fixed distances from the corner,
so the whole shape travels with the cutoff.
Zipper noise and modulation resolution
Drive the cutoff from a fast LFO — a sixteenth or faster — and listen on headphones at a
quiet level. Grit that appears only while the cutoff is moving, and vanishes when it stops, is
the filter recalculating in steps. A plugin that updates its coefficients per sample, or
interpolates between updates, will move silently. This is the single most common failure in
cheap filter plugins and the easiest one to hear once you know the test.
What happens above Nyquist
A resonant filter pushed hard generates harmonics, and drive stages inside the filter
generate a lot of them. Harmonics above half the sample rate fold back down the spectrum as
content that is not related to the note, which is aliasing.
On a clean sine sweep at high resonance it sounds like a second tone traveling the wrong way.
An oversampling option is the fix, and its presence tells you the maker thought about it.
The detector, in milliseconds
A sensitivity knob is a shrug. Attack and release in milliseconds are a specification. You
want to be able to set an attack of a few milliseconds so the filter opens on the transient, and
a release you can tune to the tempo so it closes before the next hit. Peak and RMS detection
behave differently on drums — peak tracks the stick, RMS tracks the body — and a plugin that
offers both is worth more than one with twice as many filter shapes. F(ilter)12 puts the detector under
SIDECHAIN: what it follows, what it hears, which way it travels, how far, and how eagerly it makes up its
mind.
Sync that includes swing and phase
Straight note divisions put the movement exactly on the grid, which is correct for house and
wrong for almost everything with a shuffle in it. Swing pushes every other cycle late. Phase sets
where in the waveform the cycle starts. Without those two controls an auto filter on a swung beat
sits stiffly against it, and no amount of depth fixes that. F(ilter)12 has both on the AUTO FILTER, sitting
next to the shape, the division and the grid.
A wet/dry control
Parallel filtering is the most useful trick in the category and the one most often missing. At
50 percent wet, a low-pass sweep takes brightness away in motion while the dry path holds the low
end and the transients steady. On a drum bus this is the difference between a filter you can leave
printed and one you have to automate around the chorus. MIX is that control in F(ilter)12, and it is the
one to reach for before you start cutting depth.
Stereo handling
Check whether the two channels are filtered by one cutoff or by two. Two independent cutoffs
with an offset produce a wide, moving image that can collapse when the club sums to mono, and you
will not hear it in the room you mixed in. Mid/side operation is the more useful version: filter
the sides and leave the middle alone, and the movement never touches the kick.
Drive, and where it sits
Saturation before the filter adds harmonics that the filter then removes. Saturation after the
filter adds harmonics above the cutoff you just set. Both are useful, they sound nothing alike, and
a plugin that lets you choose is doing real work. A plugin that hides its drive stage gives you one
flavor of dirt and no way out of it. F(ilter)12 fixes the order and tells you what it is: SAMPLE RATE and
BIT crush in front of the filter, DRIVE sits with it, and DIRTY feeds the filter's own distortion back
through itself or switches off for a clean run.
CPU under a full session
One instance is never the test. Twelve are. A steep resonant filter with oversampling engaged
is genuinely expensive, and a plugin with no quality switch forces the expensive path on every
instance. Look for a draft mode for tracking and a high-quality mode for the bounce.
Latency, and whether it is reported
Oversampling adds delay. A plugin that reports that delay to the host gets compensated
automatically and everything stays lined up; a plugin that does not will drag the filtered track
behind the rest of the mix by a few milliseconds, which on a drum bus sounds like the groove got
lazy. Test it by bouncing the same loop with the plugin bypassed and with it inserted at 100 percent
wet and a fully open cutoff, then lining the two files up in the DAW and checking whether the
transients sit on top of each other.
Presets, and what they are honestly for
A preset library is a browsing tool, not a quality signal. The useful thing a preset does is show
you what the makers thought the plugin was for, and a library organized by source — bass, drums,
vocals, pads — tells you more in two minutes than the feature list does. Judge presets by whether
you can reverse-engineer them: open one you like, look at what is modulating what, and if the routing
is hidden or undocumented you have bought a box of sounds rather than an instrument.
That list is the answer to "so what do I actually use".
F(ilter)12
is $49: a filter with a lo-fi section in front of it, five cutoff shapes, six resonance shapes, a SLOPE
knob that runs from 18 dB per octave up to a wall, both ways of moving the cutoff — AUTO FILTER
on a clock with SWING and PHASE, or SIDECHAIN following a signal — and DRUGS, our free drum bus
compressor, included. Every setting further down is written for it. There's a demo on the page.
How to test an auto filter plugin in ten minutes
Demos are free and almost nobody uses them properly. Run this on F(ilter)12 first and then on
anything you are weighing against it, so the comparison is the same twelve steps twice. Do not start
with a preset and do not start with a pad. Use a two-bar drum loop with a kick, a snare and hats, at
the tempo you actually work at, and run this in order.
- Load the plugin on the drum loop and set the mix to 100 percent wet.
- Choose the low-pass shape and the steepest slope available.
- Turn resonance to maximum and sweep the cutoff slowly from 20 Hz to 20 kHz by hand.
- Listen for the peak level jumping and for grit that follows the knob.
- Return resonance to about 25 percent and set the cutoff so the hats are half gone.
- Switch to LFO mode, sync the rate to one bar, and raise depth until you hear the movement.
- Change the rate to a sixteenth and listen again for stepping on the fast movement.
- Add swing if the plugin has it, and check that the movement lands with the shuffle.
- Switch to envelope mode, set attack to 5 ms and release to 120 ms, and watch the filter track the snare.
- Set the release to 400 ms and confirm the filter stays open through the tail instead of chattering.
- Drop the mix to 50 percent and check that the low end and the transients come back.
- Bounce eight bars, import the file, and listen on a phone speaker and in a car.
Step twelve is the one people skip and the one that decides it. A filter sweep that reads as
drama on monitors often reads as the track getting quieter on a phone, because the phone never
had the low end that the sweep is removing. If the movement still reads through a 1-inch driver,
the plugin and the setting are both right.
Steps six through ten are where F(ilter)12's own controls sit: AUTO FILTER for the clock, SWING for
the shuffle, SIDECHAIN for the envelope. Run them on the demo with a loop you already know and the rest
of this guide reads as instructions rather than description.
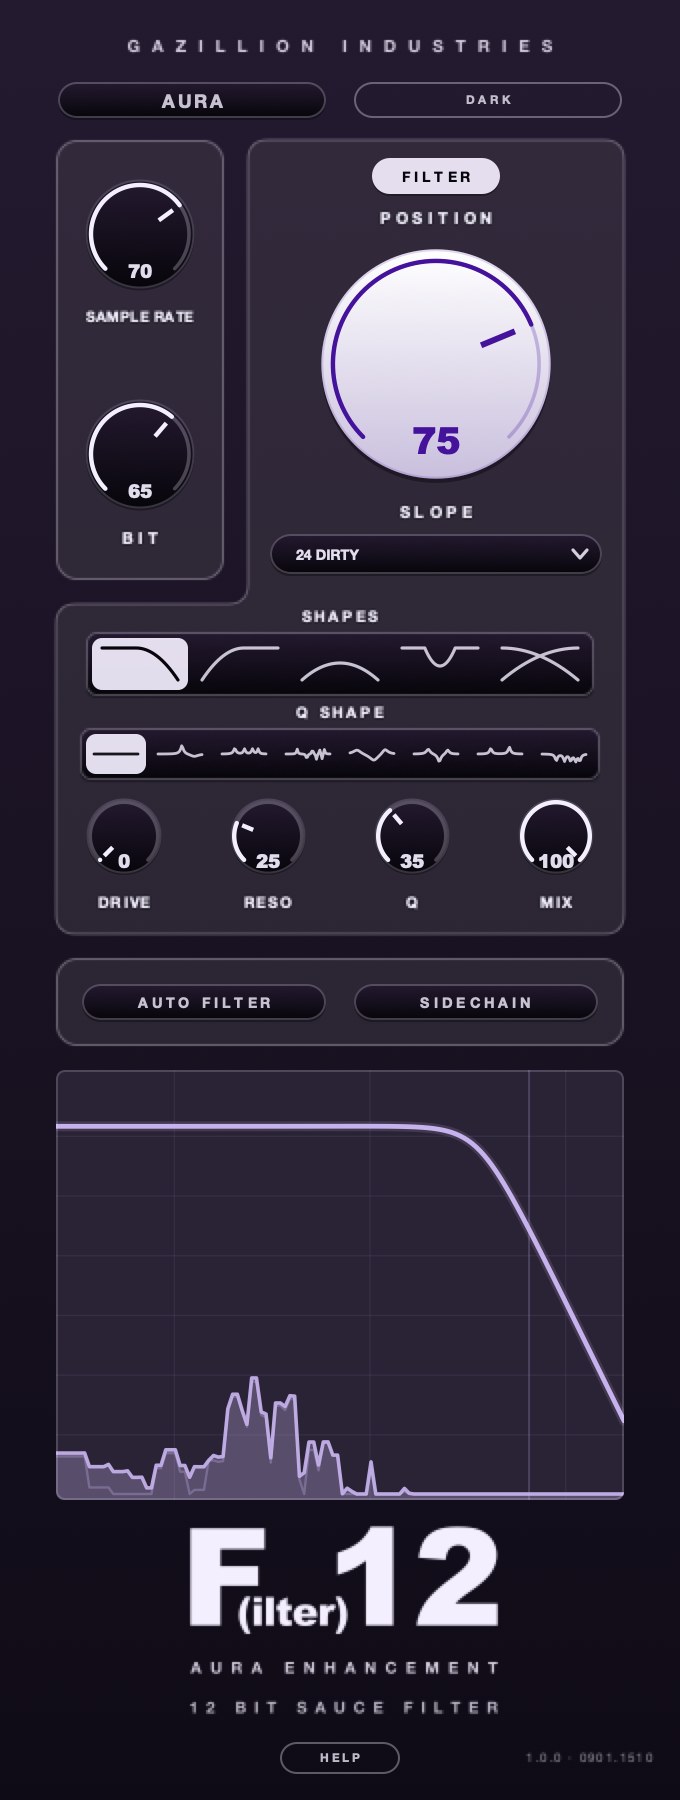 The same filter with the correction off. Test the filter first, then decide what sits on top of it.
Where the auto filter goes in the chain
Order changes the result more than any single knob. Four placements cover almost everything, and
each one has a job it is right for.
First in the chain, before everything
Put the filter at the top of the insert chain and every processor after it reacts to the filtered
signal. A compressor after a moving low-pass will pump in time with the sweep, because the energy
arriving at its detector rises and falls with the cutoff. Sometimes that pumping is the effect you
wanted. Often it is a mystery you spend twenty minutes chasing.
After the compressor
Compress first, filter second, and the level stays put while the tone moves. This is the placement
for a filter you intend to leave running for a whole section, because the part keeps its presence in
the arrangement no matter where the cutoff is. It is also the safer placement on vocals, where a
moving level is much more noticeable than a moving tone.
Before saturation
Filter into drive and the drive puts harmonics back above the corner you just set, so a low-pass
stops sounding like a blanket and starts sounding like a small speaker. Reverse the two and the filter
shaves the harmonics off again, which is the cleaner and duller option. Both are legitimate. Decide by
listening rather than by habit.
On a send
Feed a bus from several tracks, put the filter on the bus, and move one cutoff instead of six. A
swept send returning under a dry mix gives you movement without risking the parts themselves. This is
also the cheapest way to get a filtered reverb: filter the send, not the return, and the tail inherits
the movement a beat late.
Six settings that work on real material
These are starting points, not presets. Each one is written twice: in the general terms any auto
filter uses, and then in
F(ilter)12's own controls,
because a setting you can type in beats a setting you have to translate. Set it up and then move one
control at a time until the part tells you where it wants to sit.
Pad that will not sit still
Low-pass, 24 dB per octave, resonance around 20 percent, LFO synced to one bar on a sine, depth set
so the cutoff travels roughly two octaves. Mix at 100 percent. If the chord loses weight at the bottom
of the sweep, raise the base cutoff rather than reducing depth. In F(ilter)12: POSITION parked where the
chord still has weight, SLOPE modest, RESO around a fifth, Q SHAPE on PLAIN, AUTO FILTER on the
smoothest shape at a one-bar division, MIX 100.
Drum bus that needs a groove
Band-pass, moderate slope, envelope mode, attack 3 ms, release 90 ms, depth upward, mix 40 percent.
The dry path holds the kick and the wet path adds a small wah on every hit. Put the whole thing after
your bus compressor. In F(ilter)12: band-pass, Q SHAPE on WAH, SIDECHAIN following the bus itself, set to
travel upward, MIX 40.
Bass line that needs to talk
Low-pass, envelope mode, attack 1 ms, release 150 ms, high resonance, depth upward, mix 100 percent.
This is the classic envelope filter sound and it lives or dies on the release: too long and every note
runs into the next, too short and it clicks. In F(ilter)12: POSITION low, RESO high, Q narrow, SIDECHAIN
on the bass itself, and how eagerly it makes up its mind is the control that decides this one.
Transition into a drop
High-pass, automated by hand over four or eight bars, resonance around 40 percent, mix 100 percent.
Draw the automation as a curve rather than a straight line, ending one beat before the downbeat so the
drop lands in silence. Bypass the filter entirely at the downbeat instead of automating it back. In
F(ilter)12: AUTO FILTER and SIDECHAIN both off, POSITION drawn by hand on the high-pass shape, RESO
around 40, MIX 100, and BYPASS takes the whole plug-in out on the one.
Sample that sounds too new
Low-pass around 6 kHz, high-pass around 120 Hz, gentle slope on both, no movement at all. Add crush
before the filter rather than after. A static band will not move, but it is what half the people
reaching for an auto filter actually need, and it takes ten seconds. In F(ilter)12 that is one
band-pass with SLOPE gentle, and SAMPLE RATE and BIT doing the crush in front of the filter, which is
the order they are already in.
Ad-lib that should sound like it is in another room
Band-pass with the window narrow, centered somewhere between 800 Hz and 3 kHz, resonance low,
mix 100 percent, and a very slow LFO at a quarter of a hertz with shallow depth. The slow drift keeps
it from sounding like a static EQ notch. Send it to a reverb after the filter so the tail is narrow
too, otherwise the space gives away that the source is still full range. In F(ilter)12: band-pass, Q
narrow, RESO low, AUTO FILTER on the longest division you can set, and MIX pulled back until the drift
is only just there.
The auto filter plugins people name, and ours
Everything in this section was read on the maker's own page while writing. Where a price is not
listed here, the maker does not publish one on the product page, and you should check the shop rather
than trust a number from a roundup. Ours is first because it is the one we would put on the drum bus.
The rest are the names you will meet everywhere else in this category, and each of them does something
real.
Gazillion Industries F(ilter)12
F(ilter)12 is $49, with
DRUGS included free. Five cutoff shapes: low-pass, high-pass, band-pass, notch, and a morph that runs
from a closing low-pass through untouched in the middle to an opening high-pass. SLOPE is a knob from
18 dB per octave up to a wall. Six resonance shapes ride the cutoff rather than sitting still —
WAH, VOWEL, COMB, SCOOP, PLAIN, and DRAW, where you place the points yourself and right-click one for
a notch, a shelf or a cut. The cutoff moves either way, one at a time: AUTO FILTER on a clock with
SWING and PHASE, or SIDECHAIN following a signal. SAMPLE RATE and BIT crush in front of the filter.
AU, VST3 and standalone on macOS, VST3 on Windows, and there is a demo on the page.
Xfer Records LFOTool
LFOTool is listed at $49.95 USD on the Xfer site. Its editor builds LFO shapes from points with
tension curves, a preset holds 12 graphs that can be switched by MIDI note or automation, and up to
four graphs run at once targeting cutoff, resonance and pan. The rate runs in BPM with an optional
swing setting or in hertz, with sample-accurate sync. It can also send MIDI CC out to drive other
plugins or hardware, and the demo is limited to 15 minutes per session. Xfer lists macOS 10.11 or
later and Windows 7 SP1 or later.
FabFilter Volcano 3
Volcano 3 runs four filters with flexible routing, including per-channel and mid/side modes. The
page lists vintage-style shapes with internal drive and non-linearity — bell, low and high shelf, notch
and all-pass — a Drive setting per filter, and self-oscillation at high peak settings. Modulation comes
from 16-step XLFOs, envelope generators, envelope followers, XY controllers and MIDI sources, assigned
by dragging. There is a High Quality option that raises internal oversampling, a 6 dB per octave slope
option, and a 30-day trial. Formats listed are VST, VST3, Audio Units, CLAP, AAX Native and AudioSuite.
Sugar Bytes WOW2
WOW2 is listed at $99.00 and described as a creative multi-filterbox. It carries 21 filter types,
four modulation sources — an envelope follower with frequency detection, an LFO with 13 waveforms, a
16-step sequencer and a Wobble knob that moves through 16 waveforms and 12 tempo-synced rates — and a
vowel mode built on nine vowels that any of the filters can run through. The distortion unit offers
seven algorithms placeable before or after the filter, with fourfold oversampling. Demos are offered
for macOS and Windows.
Cableguys ShaperBox 3
ShaperBox 3 collects eleven shaper effects in one window, one of which is Filter, alongside Crush,
Drive, Noise, Liquid, Time, Pitch, Reverb, Volume, Pan and Width. Movement comes from drawable LFO
waveforms, envelope followers and audio triggering, and every effect can be split across three
frequency bands. The page offers a free trial. Drawing the movement as a shape is a
different way in from choosing a waveform, and F(ilter)12's DRAW puts the same idea on the resonance
instead of on the clock.
u-he Filterscape
Filterscape is listed at 129 € and is three plugins rather than one, sharing a morphing EQ that
moves between eight snapshots. The effect version carries two multimode filters with mixable low-pass,
band-pass, high-pass and notch outputs, and version 1.5 added nine further filter options in 2-pole,
3-pole and 4-pole flavors. Modulation comes from two host-synchronized 16-step sequencers with a glide
control, two host-synchronized LFOs with eight waveforms, and four envelope followers. A macOS demo is
offered, with Windows and Linux versions available, Linux still marked beta.
Devious Machines Infiltrator 2
Infiltrator 2 is listed at £99.99 and stacks, sequences and modulates up to ten effects at once out
of 54 available, filters among them. Each effect gets two tempo-synced multi-segment envelopes that can
generate random patterns and euclidean rhythms, apply swing and snap to pitch, and an onboard sequencer
switches the ten modules on and off for rhythmic patterns. The page lists macOS 10.13 or later, Windows
10 or later, VST2, VST3, Audio Units and 64-bit AAX, with Apple Silicon support, and a demo sent by
email.
Free auto filter plugins that are actually usable
You already own one, so start there and find out what it will not do. Ableton's manual lists ten
filter types in Auto Filter — low-pass, high-pass, band-pass, notch, morph, DJ, comb, resampling,
notch plus low-pass, and vowel — with
switchable 12 and 24 dB slopes on the basic four, four slopes on the morph, LFO modulation, and an
envelope follower that can read either the filtered signal itself or an external sidechain input. Logic
Pro ships AutoFilter and FL Studio ships Fruity Love Philter. Between them they cover the mechanism
this whole guide describes.
Run the twelve steps on the stock device, then run the same twelve on the F(ilter)12 demo with the
same loop. Two of the steps are the ones to watch: step three, where Q SHAPE stops the resonance being
a single peak and makes it a shape that travels with the cutoff, and step eight, where SWING pushes the
clock off the grid. Whichever way that lands, you will be able to name the
specific thing you are buying, which is the only way anybody ever chooses well in this category.
Kilohearts Filter
Kilohearts Filter is free with an account, part of a set the maker lists as 30 modular effects
plugins. It is a resonant filter with seven modes — low pass, band pass, high pass, notch, low shelf,
peak and high shelf — with a Cutoff knob, a Q knob, and a Gain control for the shelf and peak types.
The page defines the low-pass cutoff as the frequency where the signal is reduced by 3 dB, which is a
refreshing thing for a product page to bother saying.
The catch is worth stating plainly: on its own it has no modulation. Kilohearts effects also run as
Snapins inside Phase Plant, Multipass and Snap Heap, and it is inside those hosts that you combine and
modulate them. As a standalone plugin it is a filter you automate, so it covers the filter sweep job
and not the auto filter job.
MeldaProduction MFreeFXBundle
The bundle is free and contains 38 effects, two of them in the filter category: MBandPass, which
Melda describes as offering slopes up to 120 dB per octave, and MComb, a multi-comb filter. The same
page lists access to the modulators as one of the advantages of upgrading to the paid versions, so plan
on host automation rather than built-in movement unless you buy in. For a steep band-pass at no cost,
it is hard to argue with.
What the free route does not hand you is one plug-in that does the whole job in every DAW you open.
F(ilter)12 is $49 and carries
its own movement, its own resonance shapes and its own crush stage, and
DRUGS, our free drum bus
compressor, comes with it. Worth knowing if the loop you are trying to move is a drum loop, because half
of what people want from a filter on drums turns out to be weight.
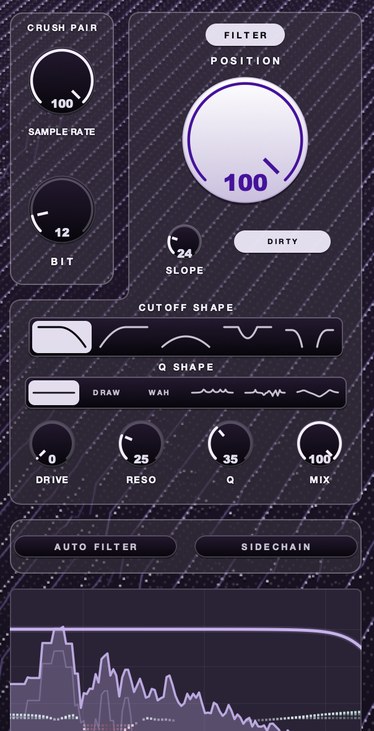 12 bit, full rate. Quantization in front of the filter, with the top still there.
What an auto filter costs you
Every technique has a bill. This one arrives in four parts and all four are avoidable once you know
where to look.
It costs low end. A low-pass sweep that sounds enormous on monitors is often just the track getting
quieter, and on a phone it reads as a fade. Check every sweep on a small speaker before you commit, and
use the wet/dry control so the dry path keeps the weight.
It costs headroom. A resonant peak at 30 percent depth can be 8 or 10 dB above the surrounding
spectrum for the moment it passes through, and your limiter will find it. If the master gets quieter
every time the filter sweeps, the peak is the reason. Reduce resonance before you reduce depth.
It costs attention. Movement is interesting for about eight bars and then it becomes the thing the
listener is waiting to stop. Print the filtered version, listen to the full arrangement, and ask whether
the movement is doing a job in the verse or only in the loop you wrote it in.
It costs CPU, and it costs it unevenly. A steep resonant filter with oversampling on can be several
times the load of the same filter at draft quality, and you will not notice until the twentieth instance.
Track at draft, bounce at high quality, and check the plugin actually offers the switch before you buy.
Four mistakes worth not making
These come up in the same order every time somebody new starts using movement on a mix bus, and
all four are cheaper to avoid than to fix at the master.
Setting depth before setting the base cutoff. Depth is a range around a starting
point, so a huge depth from the wrong starting point spends half its travel somewhere useless. Park
the cutoff by hand where the sound is right with no movement at all, then add movement around it.
Using an envelope follower on a source with no transients. A sustained pad, a held
organ chord and a wash of noise all give the detector nothing to track, so the filter sits open and
does almost nothing. Feed the follower from a drum track through the sidechain input instead, and the
pad gets rhythm it could never generate for itself.
Two movement sources on the same part. An auto filter running underneath written
cutoff automation produces a result nobody can predict, and the fix is always to delete one of them.
Pick the clock or pick the hand. If you need both, use two instances and give each one a job.
Judging the setting inside a four-bar loop. Movement that is exactly right on
repeat is usually too much across a three-minute arrangement. Set the depth in the loop, then play the
whole record and take a third of it away. The version that feels slightly under-done in the loop is
almost always the one that survives the full listen.
Every answer below is one we had to settle while building
F(ilter)12 — a cutoff
that moves two ways, a resonance with a shape, and a crush stage in front of it.
Questions people ask
What is the best auto filter plugin?
The one whose resonance stays proportionate at the top of its range and whose cutoff can be driven by
the signal as well as by a clock. Those two decide how it sounds on real material. Filter count, preset
library and interface decide only how often you reach for it. Ours is F(ilter)12 at $49, and the reason
is those same two: SIDECHAIN drives the cutoff from a signal, and Q SHAPE gives the resonance a shape
that travels with the corner.
What is the best auto filter VST for someone starting out?
Open the one in your DAW first. Ableton Live, Logic Pro and FL Studio all ship one, and Ableton's own
manual shows the device carrying an envelope follower with a sidechain input. Run the twelve steps on it,
then run them on the F(ilter)12 demo. If you change DAW, or you want the resonance to have a shape and
the clock to swing, $49 is where that lives.
What is the best envelope filter plugin?
Whichever one gives you attack and release in milliseconds rather than a single sensitivity control, a
bipolar depth so the filter can close on loud input as well as open, and a sidechain input so the movement
can come from another track. A detector you can set is worth more than extra filter shapes. F(ilter)12
puts that on SIDECHAIN: what it follows, what it hears, which way it travels, how far, and how eagerly
it makes up its mind.
Is an envelope filter VST the same as an auto filter VST?
An envelope filter is one mode of an auto filter. The cutoff follows input level instead of a clock, so
the shape is played rather than programmed. Guitar players call the same circuit an auto-wah. Most modern
filter plugins include both modes, and the useful question is how good each one is. F(ilter)12 carries
both and runs one at a time, because two sources on one cutoff means neither knob does what it says.
What is the best filter sweep plugin?
For a sweep specifically, the deciding factor is parameter smoothing. Automate a cutoff over eight bars
at high resonance and listen for stepping. Any plugin that glides through that without grit will make a
clean sweep; any plugin that steps will need the sweep hidden under a riser. To do it in F(ilter)12,
leave AUTO FILTER and SIDECHAIN off and write POSITION by hand.
Why does my filter sweep sound crunchy or stepped?
Usually the plugin is updating its filter coefficients once per audio block rather than interpolating
between updates, so a moving cutoff arrives as a staircase. Sometimes it is aliasing from drive inside a
high-resonance filter. Lower the resonance to test which one you have: if the grit survives, it is
aliasing, and oversampling will help.
Should the auto filter go before or after the compressor?
After, if you want the level to stay steady while the tone moves. Before, if you want the compressor to
pump in time with the sweep. Neither is wrong, but an unexplained pump on a filtered track is almost always
a filter sitting in front of a compressor.
Do I need to pay for an auto filter plugin at all?
Not for the basic job. Stock DAW filters and free plugins will move a cutoff. Money buys the parts
that decide how it sounds while it moves: a resonance with a shape, swing and phase on the clock, a drive
stage with a known place in the chain, and the same plug-in in every DAW you open. That is what the $49
on F(ilter)12 buys, and it starts to matter the moment the filter is carrying a section rather than
decorating a bar.
What F(ilter)12 does
F(ilter)12 is a
12 bit sauce filter for Mac and Windows, $49, in AU, VST3 and standalone, with DRUGS included free.
POSITION sets where in the spectrum the filter sits, and it drives harder
the further it works. SLOPE runs from 18 dB per octave up to a wall. There are five cutoff
shapes — low-pass, high-pass, band-pass, notch, and a morph that travels from a closing low-pass through
untouched in the middle to an opening high-pass.
Q SHAPE is the part most filters do not have: peaks and dips placed at fixed distances
from the cutoff, so the whole shape travels with the knob. WAH is one strong peak at the corner, VOWEL is
four peaks spaced like a voice, COMB alternates peaks and nulls, SCOOP lifts both ends and pulls the middle
down, PLAIN adds nothing, and DRAW is yours — click the display to add a point, drag it, pull its handles
for width, right-click it for a notch, a shelf or a cut.
DRIVE, RESO, Q and MIX sit under
them: RESO decides how much resonance, Q decides how narrow, MIX decides how much of any of it you keep.
DIRTY feeds the filter's own distortion back through itself, and switches off for a clean
run. In front of the filter, SAMPLE RATE and BIT are the crush pair.
The cutoff moves two ways, one at a time, because two sources on one cutoff means neither knob does what
it says. AUTO FILTER hands it to a clock: a shape, a division, a grid, SWING to push it off
the grid, and PHASE for where each cycle starts. SIDECHAIN hands it to a signal: what it
follows, what it hears, which way it travels, how far, and how eagerly it makes up its mind.
Same loop, same eight bars. Now the second pass is the one you wait for.
F(ilter)12 — a 12 bit sauce filter for Mac and Windows: a lo-fi section,
five filter shapes, six resonance shapes and AURA.
Hear it
Keep reading
- How to use an auto filter — LFO and envelope modes, sidechain filtering, and keeping it in the groove.
- How to make a filter sweep — High-pass and low-pass builds, automation curve, resonance, and what to sweep.
- Filter cutoff and resonance explained — The corner frequency, the slope, the resonant peak, and what each costs.
- What is aliasing in audio — What it is, what it sounds like, how to prevent it, and how to use it on purpose.
- Best lofi plugins — The four jobs a lofi chain needs, and what to buy first.