← Gazillion Industries/Reading material
Best 12 bit sampler plugins
Gazillion Industries ·
The same question turns up in a production Discord most weeks.
Somebody wants the dusty, grainy sampler sound off the records they grew up on, and five
people answer with five different plugin names. Nobody says what that sound is made of,
which is why the fifth plugin does not fix it either.
Two processes make it, and any plugin worth buying gives you both, separately. Bit
depth reduction coarsens the steps each sample is measured in, which lifts a grainy noise
out of the quiet parts. Sample rate reduction cuts the top end and folds what was up there
back down as new, out-of-tune content. A 12 bit sampler plugin with only a BITS knob does
half the job, and the missing half is the half people actually hear.
The short version
- Two controls
- bit depth and sample rate; you need both, on separate knobs
- 12 bit
- 4,096 steps per sample, about 72 dB of range
- The grain
- quantization noise, loudest on tails, fades and reverb
- The clang
- aliasing from rate reduction, not from the bits
- Test it
- level-matched bypass on a decaying tail, never on a transient
- Start free
- every major DAW ships a crusher that does the basics
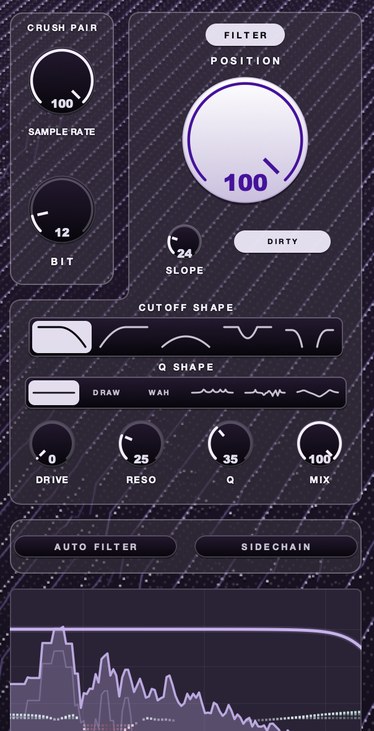 BIT 12, SAMPLE RATE 100. Twelve bits with the rate left alone. The grain is in, the top end is untouched.
What 12 bit actually means
Bit depth is how many levels each measurement of the wave is allowed to land on.
Twelve bits gives 4,096 of them. Sixteen gives 65,536. Every bit you take away halves
the number of steps and removes roughly 6 dB of dynamic range, so 16 bit holds about
96 dB between the loudest sample and the floor, 12 bit about 72 dB, and 8 bit
about 48 dB. None of that touches frequency content. It changes how finely the wave
can be described, and nothing else.
The error between the real wave and the staircase it gets forced onto is the sound you
are buying. It behaves like noise, but it tracks the signal: loud when the music is loud,
and left standing in the open when the music stops. That is why a crushed reverb tail
sounds gritty while a crushed sustained bass note often sounds almost untouched. The full
mechanism, with the arithmetic, is in bitcrushing explained.
Twelve is a specific number for a reason. The samplers that defined the sound of a
decade of hip-hop and house stored audio at twelve bits because memory cost money. Producers did not choose
that grain. They inherited it, worked around it, and then the next generation went looking
for it on purpose. Anyone selling you a 12 bit sampler plugin today is selling you a
limitation that somebody else was stuck with.
Worth saying plainly, because plugin copy tends to blur it: twelve bits does not sound
warm. It sounds slightly dirty in the quiet places. What people hear as warmth in old
sampled records is usually the filtering, the converters, the tape the source came off,
and the fact that somebody pitched the sample down. Bit depth is one ingredient in a
chain, and on its own it is the least dramatic one.
Sample rate reduction is the other half
Sample rate sets the highest frequency a digital signal can carry: exactly half the
rate, which is the Nyquist limit. Run at 44.1 kHz and the ceiling is 22.05 kHz.
Drop the rate to 22 kHz and the ceiling falls to 11 kHz. Everything above the
new ceiling has to go somewhere.
In a proper converter it is filtered out before the rate changes. In a lo-fi effect it
deliberately is not, so those frequencies fold back down below the ceiling as new tones
that have no harmonic relationship to the notes being played. That folded content is
aliasing, and it is the metallic, slightly detuned clang people associate with cheap
digital gear. It is also the part most producers mistake for bit depth. Full explanation
in what is aliasing in audio.
The practical consequence: rate reduction is the more audible of the two by a wide
margin, and it is the control to reach for first. If a sample rate reduction plugin has a
clean anti-alias filter that cannot be switched off, it will sound polite and you will keep
pushing it further than you meant to. If it has no filter at all, it will sound vicious at
small amounts. Good ones let you choose.
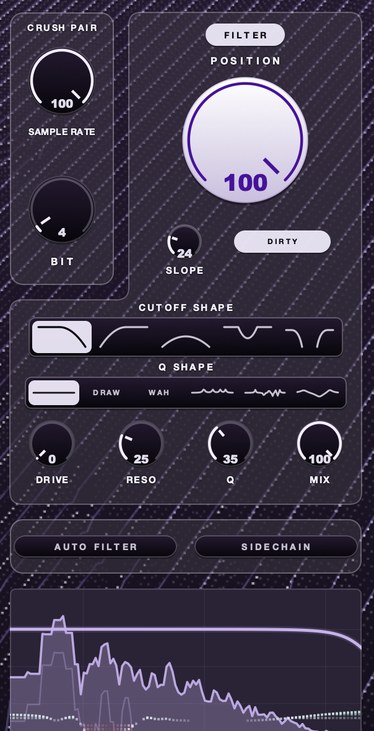 BIT 4, SAMPLE RATE 100. One knob moved from the shot above. Same rate, same filter, and the floor underneath has come up to meet the music.
Hear the two halves on their own
The same one-second source four times, so the words above have something to point at.
Clean, then bit reduction on its own, then rate reduction on its own, then both.
Clean — no processing
Bit reduction only — rate untouched
Rate reduction only — bits untouched
Both — the pair together
We measured those four files rather than describing them from memory. Peak
level sits within 0.6 dB across all four, so nothing here is louder-sounds-better.
On the bit reduction render, the last fifth of the file measures about 10 dB louder
than the same stretch of the clean render, and the source has already decayed by then:
that difference is quantization noise and nothing else. On the rate reduction render the
tail level barely moves, but the frequency holding 99 per cent of the energy climbs from
roughly 870 Hz to roughly 3.3 kHz — content that is not in the source,
folded down from above the new ceiling. Two processes, two completely different
fingerprints, which is exactly why one knob cannot give you both. Rendered through
F(ilter)12.
Effect or instrument: one query, two products
Search "12 bit sampler plugin" and the results mix two things that do not compete with
each other. Sort this out before you spend anything, because buying the wrong one is the
most common waste in this category.
A sampler instrument loads your own audio, maps it across a keyboard
and plays it back, and the vintage ones add period-appropriate degradation on the way out.
You want this if you are building kits, playing chops from a MIDI controller, or you want
pitch and playback handled inside one window. It replaces your DAW's sampler.
A lo-fi effect sits on a channel and processes whatever arrives. You
want this if your samples are already on the timeline, if you chop with audio clips rather
than a keyboard, or if you want the grain on a bus over several tracks at once. It replaces
nothing and stacks with everything.
Most people asking for a vintage sampler plugin actually want the second one. They have
already chopped the loop — see how to
chop samples — and what is missing is the character, not the playback engine.
Buying a whole instrument to get a bit depth control means learning a new sampler workflow
for an effect you could have put on a send.
There is one real reason to go the instrument route: pitch. On the old machines, playing
a sample at a different key moved the sample rate with it, so pitching down darkened the
sound and pitching up thinned it. That is varispeed, covered in what is varispeed, and it is a big part of why those records
sound the way they do. An effect plugin cannot give you that, because it never sees the
note. If pitch-linked degradation is the thing you are chasing, you need an instrument, or
you need to commit the pitch first — how
to pitch a sample covers doing it by hand.
F(ilter)12
is our 12 bit sauce filter for Mac and Windows, and it takes the effect route: SAMPLE RATE
and BIT sit together as a CRUSH PAIR with a filter behind them, so the crush and the thing
that tames the crush are on one face. There's a demo on the page.
What separates a good one from a bad one
Six things, in the order they will matter to you. None of them appear in marketing copy,
which is why demos of these plugins all sound convincing and half of them disappoint a week
later.
One: the two controls are independent. A single DEGRADE or LOFI knob
that moves bits and rate together is a preset with a handle on it. You will hit the point
where the rate is right and the grain is too much, and there will be nothing you can do
about it. Separate controls are the single strongest signal that a developer understood the
problem.
Two: there is a filter, and you can put it after the crush. Rate
reduction throws folded content across the whole spectrum, and most of what makes it
unusable lives up top. A low-pass after the crusher removes the harsh part and keeps the
grain. A low-pass before the crusher changes what gets folded in the first place, which is
a different and quieter result. A plugin that offers both positions is giving you two
sounds. Cutoff and resonance
covers the controls themselves.
Three: it does something useful at small settings. Every crusher sounds
dramatic at 4 bits. The test of a good one is whether 12 bits with a gentle rate drop does
anything you would keep in a mix. Cheap implementations round to the nearest step and
nothing else, which at 12 bits is close to inaudible on a loud source. Better ones add a
choice about how the rounding happens, and that is where the useful subtle settings live.
Four: the dither question is answered. Dither is low-level noise added
before quantization so the error stops correlating with the signal, which trades a fixed
hiss for a grain that no longer moves with the music. In mastering it is a correctness
tool, covered in dithering. In a lo-fi plugin it is
a character control, and having it means you can pick between a steady floor and a floor
that breathes. Plugins without it give you one flavor of grain forever.
Five: automation does not click. You will automate these controls. Bit
depth and sample rate are inherently steppy parameters, and a developer who has not smoothed
them will hand you a click on every move. Sweep the rate control fast during playback before
you buy. If it zippers on a demo it will zipper in your project.
Six: the output level is honest. Crushing changes level, usually
upward, and a plugin that gets louder as you turn it up will sound better than it is. Check
whether there is output trim and whether the bypass is level-matched. If it is not, you are
judging loudness, not character. Gain staging
applies here exactly as it does anywhere else.
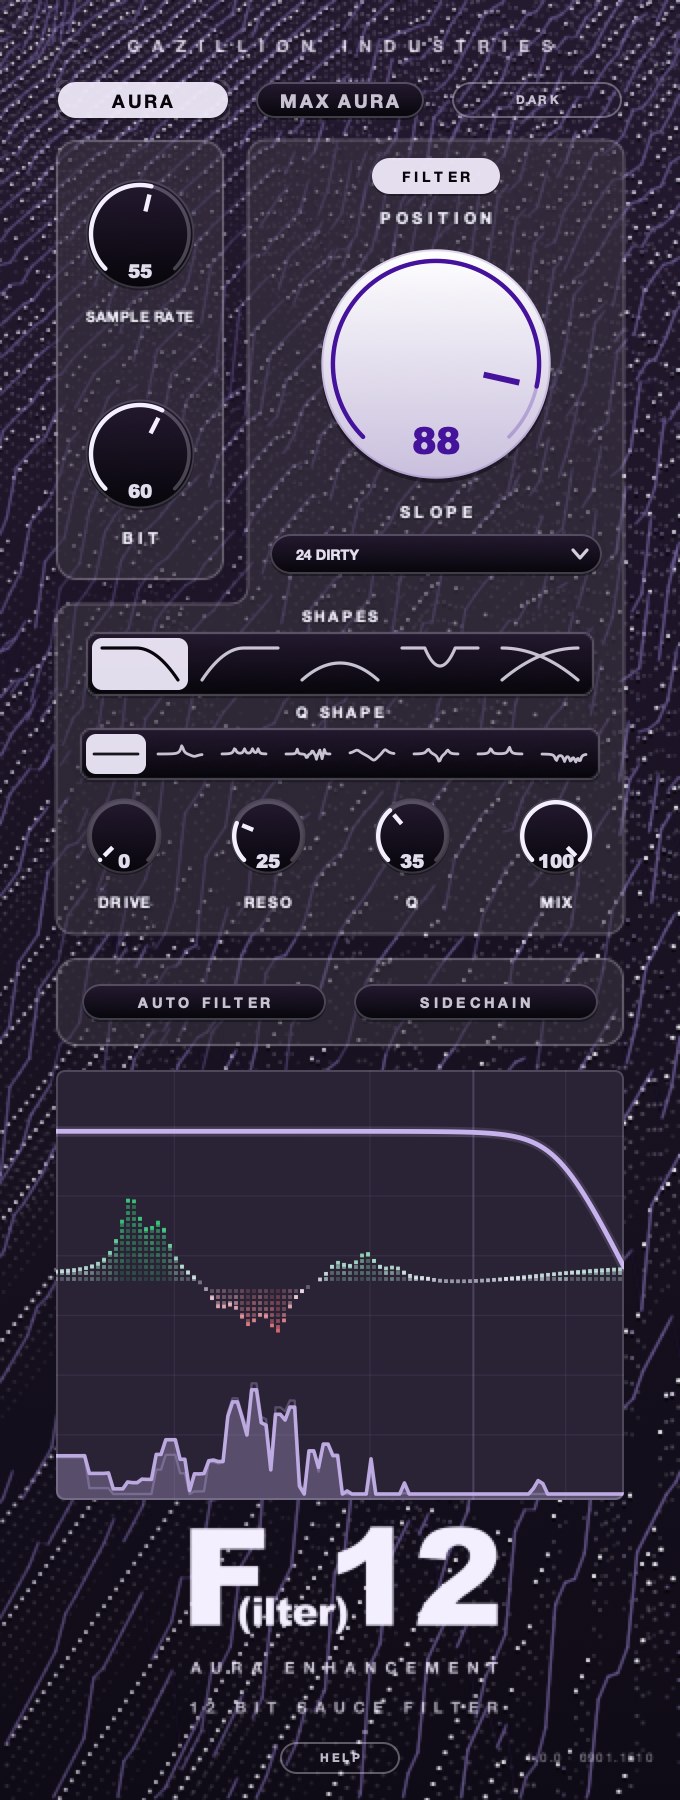 The whole face. Crush top left, filter top right, shapes in the middle, and what it is doing along the bottom.
How to test one in ten minutes
Demos are rendered by the person who wants your money, on material chosen because it
flatters the plugin. Run your own test instead, on a loop you already know, and run the same
test on every candidate so the results are comparable. Ten minutes per plugin is enough to
sort the field.
- Load a two-bar drum loop you have heard hundreds of times, with a cymbal or a reverb
tail in it.
- Insert the plugin and set every control to its most neutral position.
- Match the bypassed and processed levels to within 0.5 dB using your meters.
- Bypass and unbypass on the tail, not on the transient, and note whether anything
changed.
- Set bit depth to 12 and leave the sample rate alone. Listen for a rise in the floor
between hits.
- Return bit depth to full and lower the sample rate until the top end dulls. Listen for
new tones that were not in the source.
- Sweep the sample rate control by hand during playback and listen for clicks or
zipper noise.
- Engage any filter and move it from before the crush to after it, if the plugin allows
both.
- Set the dry/wet to 50 per cent and check the result in mono for phase problems.
- Bounce the loop and play it on your phone speaker, then in the car.
Step ten decides it. A crushed loop that sounds characterful on monitors and turns into
a fizzing mess on a phone is a plugin adding content in the upper midrange that your
monitors flatter and a small driver exaggerates. Most listening happens on small speakers, and
mono compatibility matters more in this
category than in almost any other, because folded content is not phase-coherent between
channels when the plugin processes them independently.
Where it goes in the chain
Position changes the result more than the settings do. The rule that holds: put the
crusher where the signal is already the shape you want, because everything after it will
either hide the grain or amplify it.
Before compression the crusher's noise floor gets pulled up with
everything else, and the grain becomes much more obvious than it sounded on its own. This is
usually a mistake on a full mix and often exactly right on a single drum bus, where you want
the dirt to feel welded on rather than laid over. Compressing drums covers the settings side.
After compression the grain sits on top at a constant level and reads
as a surface treatment. Cleaner, more controllable, less convincing as an artifact of an
old machine.
Before reverb is the most under-used position. The reverb then blurs the
folded content into a wash and the result sounds like a degraded recording of a room rather
than a clean room with dirt sprayed on it. After reverb, the tail gets the grain and the
source stays clean, which is a specific effect and rarely the one people want.
Before saturation feeds quantization noise into a nonlinear stage,
which multiplies it into something much bigger. Handle with care, and read
saturation vs distortion first so
you know which kind of stage you are feeding.
On a parallel send is the safest place to start. Crush hard on the send,
bring it up underneath the dry signal, and you keep the transients intact while the grain
fills the space between them. On drums this is close to unbeatable, and it is the setting
most producers arrive at eventually after a year of wondering why their crushed loops lose
punch.
On the master is the one position to avoid. Crushing a finished mix
hits the quietest elements hardest, which is the reverse of what you want, and it makes
every later decision about loudness harder. If the whole record should sound degraded,
crush the stems. See how to master a
beat.
Named options, and what we could actually verify
Every claim below was read off the maker's own page in September 2026. Where a page
would not show us a price, there is no price here; several plugin sites load prices after
the page and a wrong number is worse than no number. Prices move, so check before you buy.
We are not ranking these, because the right one depends on which half of the query brought
you here.
Sonic Charge Permut8 is the closest thing on this list to the actual
subject of the search. Its page describes a 12 bit digital delay at the core with a variable
sample rate from 0 to 352 kHz, driven by a programmable processor whose operators
change and modulate the delay time, with virtual analog saturation, limiting and filtering
on the input and output. It lists at $66, ships with 320 presets across 11 program banks,
runs in VST 2.4, VST3 and Audio Units 2 hosts, and offers a three-week trial. It is the
least conventional plugin here and the one most likely to produce something you did not
plan.
D16 Group Decimort 2 is listed on their effects page at €59 as a
bit crusher, described there as simulating the whole sampling path that exists in any
analog-to-digital and digital-to-analog conversion rather than just rounding numbers. That
framing is the useful part: the converter chain is where a lot of the character of old
digital gear came from, and a plugin built around that idea will behave differently from one
built around a quantizer.
Klevgrand Degrader is a combined resampler and bitcrusher at $39.99 for
macOS and Windows in AU, VST and AAX, with a separate iPad AUv3 version. Its page lists
resampling anywhere between 250 Hz and 96 kHz, bit depth continuously variable
between 3 and 24 bits, a low-pass filter available both before and after the resampling
stage in two characters, a jitter amount, an extra distortion algorithm and parameter
linking so one knob can drive several. Continuous bit depth rather than integer steps is
unusual and useful. The demo is the full version with occasional audio dropouts.
Tritik Krush2 combines bit depth reduction, sample rate reduction,
filtering and compression in one plugin. Its page lists analog-modeled resonant filters
including comb and band-pass types, a filter position switch for pre or post, two stereo
LFOs with adjustable left-right phase offset and rates up to 20 Hz, a downsampling
jitter control, a bitcrushing dither control, a drive stage with up to 8x oversampling and a
one-knob compressor. Mac builds cover VST3, AU and AAX and Windows covers VST3 and AAX;
macOS 10.15 or later, Windows 10 or 11. The demo is fully functional with occasional audio
fades. We could not read a price off the page, so we are not quoting one. On the checklist
above it scores well: separate controls, switchable filter position, and dither present as a
character control.
Unfiltered Audio LO-FI-AF goes wider than bit reduction, using impulse
responses and spectral shaping to produce artifacts from vinyl, analog radio, lossy codecs,
compact discs, cassettes and phone speakers. Four modules can be toggled and reordered for
24 signal paths, and 14 skins ship with it. When we read the page it showed $45 against a
regular price of $75, which means the number you see may differ from the number we saw.
Worth knowing: codec artifacts and vinyl noise are different media with different
fingerprints, and people reaching for this expecting a 12 bit sampler sound sometimes get
crackle instead.
On the free side, Kilohearts Bitcrush is free with an account and does
the fundamentals properly. Its parameter list covers rate down to a minimum of 200 Hz,
a bits control, a dither control, separate quality controls for the analog-to-digital and
digital-to-analog stages — lowering the first adds dissonant aliasing in the low
frequencies and lowering the second adds it in the high frequencies — and a dry/wet
mix. It runs as an ordinary VST, AU or AAX plugin and also as a module inside their host
plugins. Two aliasing controls aimed at opposite ends of the spectrum is more thought than
most paid crushers show.
iZotope Vinyl is a free download in AU, AAX, VST3 and VST2, all 64-bit,
and it now includes a lo-fi effect aimed at the tone of late-1980s hip-hop resampling
alongside its dust, scratch, warp and mechanical noise controls. Different medium, adjacent
job, and the price is zero.
Glitchmachines Fracture is a free buffer effect with a multimode
filter, three LFOs, a delay, a reorderable effect chain and 100 factory presets, in VST3 and
AU for Mac and Windows. It is not a bit crusher, but buffer effects and rate reduction
scratch a related itch, and it costs nothing to find out whether the itch you have is
actually this one.
If the instrument half of the query is what you need, Decent Sampler is
free and plays samples in its own format, which makes it a no-cost way to get your chops
onto a keyboard before you decide whether a paid vintage sampler instrument is worth it.
Put a crusher after it and you have most of the sound for nothing.
The crusher already installed on your machine
- Ableton Live
- Redux
- Logic Pro
- Bitcrusher
- FL Studio
- Fruity Squeeze
Run the ten-minute test on your stock plugin before you buy anything. It will do the two
core jobs, and on a lot of material the difference between it and a $60 plugin is smaller
than the difference between putting it before the reverb and putting it after. Buy when you
have found a specific thing the stock one will not do — usually the filter position
switch, the dither control, or clean automation.
12 bit sampler VST free: what free actually costs
Free is a reasonable place to finish, not just to start, and in this category the gap
between free and paid is narrower than in compressors or reverbs. The mechanism is simple
arithmetic. Nobody has a secret algorithm for rounding numbers.
What you tend to lose: oversampling, so the plugin's own processing adds aliasing you
did not ask for on top of the aliasing you did — see
oversampling for why that matters. Filter
quality and filter placement options. Smoothed automation. Output trim and level-matched
bypass. Preset systems worth using. Support and updates when your operating system moves
under you.
What you rarely lose: the actual sound of twelve bits. A free plugin quantizing to 4,096
steps produces the same staircase as a paid one quantizing to 4,096 steps. The difference
shows up in what surrounds that staircase, which is why the checklist above is about
filters, dither and automation rather than about the crush itself.
A fair way to spend nothing and still learn something: install two free crushers and your
stock one, run all three through the ten-minute test on the same loop, and write down which
one you reached for. If all three land in the same place, you have your answer and you keep
your money. If one of them does something the others cannot, you now know exactly what
feature you are shopping for, which is a much better position than browsing a store page.
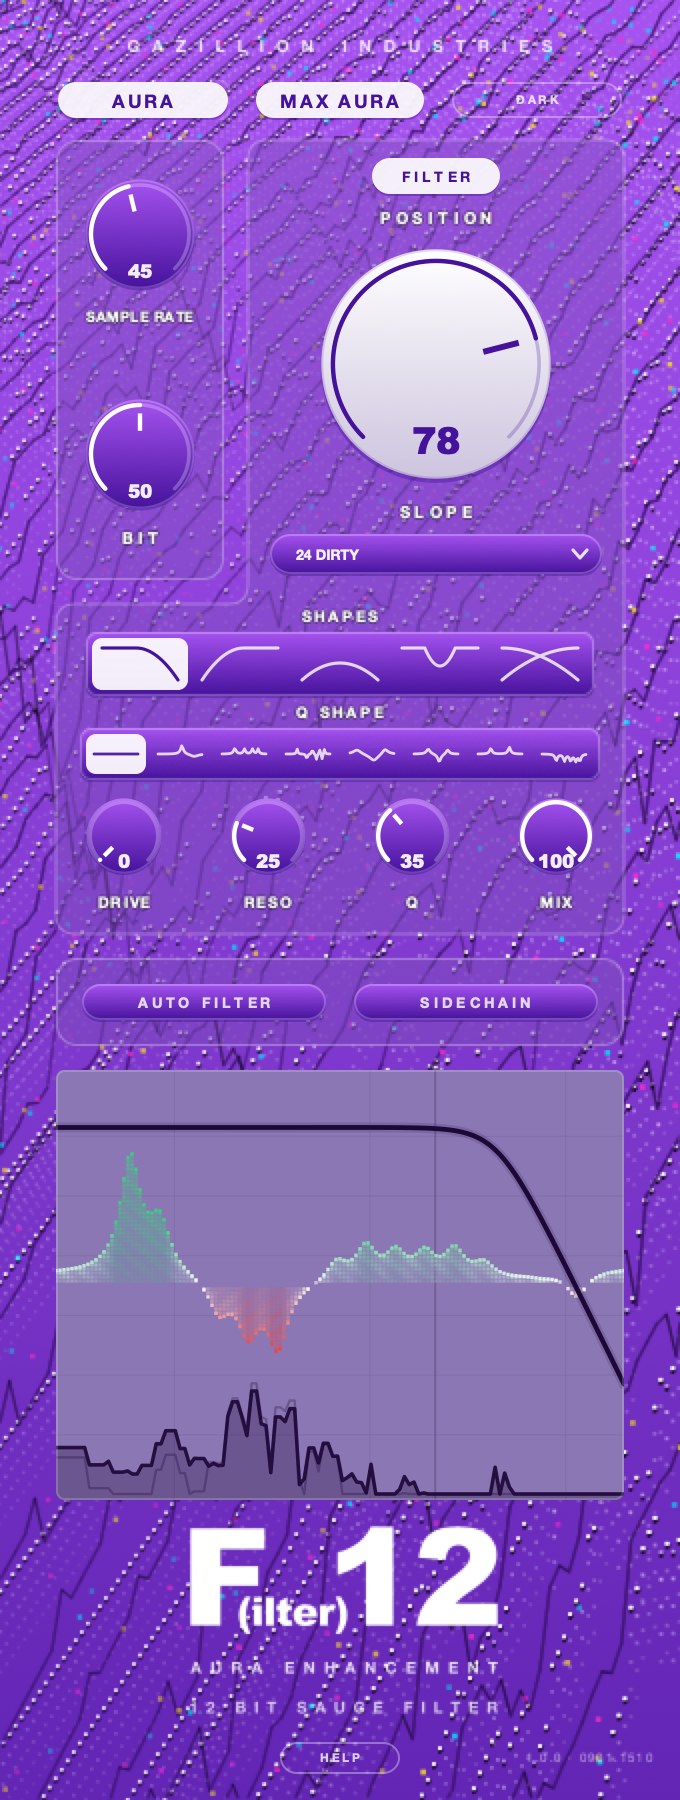 The light finish. Same controls, same places — SAMPLE RATE 45, BIT 50, POSITION 78, and the visualizer showing what that costs the top end.
Settings that get close to the era
These are starting points, not recipes, and the source matters more than the numbers.
Set them, then move them until your loop sounds right rather than until the readout matches
a guide.
Drum break, subtle. Bit depth 12, sample rate reduced by a quarter,
low-pass after the crush somewhere between 8 and 12 kHz, dry/wet at 100 per cent. This
is the setting that sounds like almost nothing until you bypass it. It is also the one that
survives a mix. Pair it with the treatment in how to make drums sound dusty.
Drum break, obvious. Bit depth 8 to 10, sample rate down by half,
low-pass at 6 to 8 kHz, and a little drive before the crusher. Expect to lose some
snare weight and plan to get it back with parallel compression rather than by backing the
crusher off.
Melodic loop or chop. Bit depth 12, rate reduction light, and put the
low-pass before the crusher instead of after. Folded content lands on top of held notes and
reads as out-of-tune much faster than it does on drums, so give the crusher less to fold.
Flipping a sample covers the rest of the
treatment.
Vocal. On a send, not an insert, at 8 bits with heavy rate reduction,
blended at 15 to 30 per cent under the dry vocal. Full-band crushing on a lead vocal turns
consonants into spray. Automate the send up on the last word of a line instead.
Whole beat, for a demo feel. Bit depth 12, rate reduction light,
everything on a bus, and a low-pass around 12 kHz. Then take it off and see whether you
miss it. Half the time the answer is no, which is useful information about the beat rather
than about the plugin. How to make lofi
beats covers the wider arrangement.
What it costs you
Every technique in this category has a bill attached, and the bill comes due at the mix
stage rather than while you are enjoying the effect.
Noise where you wanted air. Quantization noise sits in the quiet parts,
which is also where reverb tails, room tone and fades live. Crush a loop with a long tail
and you have traded the tail for grit. That can be the whole point, but decide it rather
than discover it.
Low end gets messy. Bit reduction adds broadband noise, and broadband
includes the bottom. On a sub-heavy track this reads as mud and it is nearly impossible to
EQ out because it moves with the signal. Crush a filtered copy instead and keep the
fundamental clean.
Loudness processing exposes it. Limiting and clipping raise quiet
material, and your grain is quiet material. A crushed mix that sounds right at rough-mix
level can sound noticeably dirtier after mastering. Getting a mix louder and
crest factor both bear on this.
Small speakers exaggerate the fold. Folded content from a rate reduction
tends to land in the midrange and upper midrange, where phones and laptops are most
sensitive and where monitors are comparatively forgiving. This is the single most common reason a crushed beat sounds great in the
room and harsh on the bus.
It stops being a choice. The honest cost. Print the crush and you have
committed; leave it live and it will follow you through every mix revision, tempting you to
turn it up. The producers who use this well tend to commit early, then mix the result as if
it were the source.
Mistakes that make it sound fake
Contempt here is for the practice, not for anybody's record. These are the four things
that separate a beat that sounds sampled off something from a beat that sounds like a
plugin was left on.
One knob, all the way up. The single-control lo-fi plugin encourages a
single gesture, and the result is that every track in the project has the same amount of the
same thing. Old records are uneven because different parts came off different sources.
Vary it per element.
Crushing something already clean and modern. A crisp sampled piano with
full top end and a 12 bit crusher on it sounds like a crisp sampled piano with a crusher on
it. The era sound involves a source that was already limited, pitched, filtered and printed.
Making a sample sound old goes
through the whole chain, and the crusher is the fourth thing in it, not the first.
Skipping the filter. Nothing marks digital degradation as fake faster
than full-bandwidth grit. Old converters had filters on both ends and they were not gentle.
A low-pass is not a compromise on the effect; it is part of the effect.
Treating noise as detail. Turning the crusher up until you can hear it
clearly in solo, then finding it disappears in the mix, then turning it up further. Judge
it in context at mix level from the start, and if it only works soloed, it does not work.
Mixing drums is where this usually bites.
Questions people ask
What is the best 12 bit sampler plugin?
There is no single answer, because the query covers two different products. If you want
an effect for audio already in your session, the thing to shortlist on is separate bit and
rate controls, a filter you can place before or after the crush, and clean automation. If
you want an instrument that plays your samples with period degradation, you are shopping for
a sampler and the crush is a feature of it. Run the ten-minute test above on your stock
crusher first; a good proportion of people asking this question already own something that
does the job.
Is there a free 12 bit sampler VST?
Yes, several, and the free ones are closer to the paid ones here than in most categories
because the underlying process is arithmetic. Kilohearts Bitcrush is free with an account
and includes rate, bits, dither and separate converter-quality controls. iZotope Vinyl is a
free download and now carries a lo-fi effect. Glitchmachines Fracture is free and covers
adjacent buffer territory. Decent Sampler is free if what you need is the instrument side.
And every major DAW already includes a crusher. What you give up with free is usually
oversampling, filter placement options and smoothed automation, not the sound of twelve
bits.
What is the difference between a vintage sampler plugin and a bitcrusher?
A bitcrusher is an effect that reduces bit depth, usually with sample rate reduction
alongside it. A vintage sampler plugin is normally an instrument: it loads and plays your
audio, and applies degradation as part of playback, often tied to pitch so that playing
lower darkens the sound. The effect can be put on anything; the instrument replaces your
sampler. If your samples are already chopped onto the timeline, the effect is almost always
what you want.
Does a sample rate reduction plugin make things sound 12 bit?
No, and mixing these up is the most common confusion in this category. Rate reduction
removes top end and folds content back down as aliasing, which is the metallic, clanging
part. Bit reduction coarsens the amplitude steps, which is the grainy, noisy part heard in
the quiet places. Rate reduction is far more audible, so a rate-only plugin will sound more
dramatic while still missing the grain. You want both, on separate controls.
What sample rate should I use for a 12 bit sound?
There is no single correct figure, because the classic machines did not agree with each
other. Useful ranges to try: a light reduction to roughly three quarters of your project
rate for a subtle darkening, half for an obvious lo-fi character, and a quarter or lower for
overt destruction. Set it by ear against a low-pass filter rather than by matching a number,
since the low-pass is doing much of the work you are attributing to the rate.
Does bit depth reduction lose low end?
It does not remove low frequencies, but it adds noise across the whole spectrum
including the bottom, and on bass-heavy material that reads as mud. The noise moves with the
signal so a static EQ cut will not chase it. The standard fix is to split the signal: keep
the low band clean and crush a high-passed copy, then recombine. Check the result in mono
afterwards.
Should I put the bitcrusher before or after the filter?
Both are valid and they give different results. A low-pass after the crusher removes the
harsh folded content and keeps the grain, which is the safer and more common choice. A
low-pass before the crusher reduces what is available to fold in the first place, producing
a quieter, more controlled degradation. Plugins that let you switch the position are giving
you two distinct sounds for one price, which is worth paying attention to when comparing.
Why does my crushed sample sound harsh on phone speakers?
Because the content folded down by rate reduction tends to land in the midrange and upper
midrange, which is the range small drivers emphasize and studio monitors are comparatively
forgiving about. Add a low-pass after the
crusher, check the result in mono, and bounce and listen on a phone before you commit. If it
survives a phone speaker it will survive anything else, and most of your listeners are on
one.
Is 12 bit better than 16 bit?
Technically no. Sixteen bits carries about 96 dB of dynamic range against roughly 72 dB
at twelve, with a correspondingly lower noise floor. Musically the question is different:
twelve bits imposes a grain that a lot of people associate with records they love, and
choosing it is an aesthetic decision rather than a technical improvement. Nobody crushes
audio for accuracy.
Can I get a retro sampler plugin sound without any plugin at all?
Partly. Pitching a sample down and back up loses information on the way and is the oldest
method in the category. Bouncing through a lossy codec at a low bitrate produces its own
recognizable artifacts. Recording out to a small speaker and back in through a microphone
puts a real room and a cheap transducer in the chain. None of that is an argument against a
plugin, which is faster and repeatable, but knowing which part of the sound you are paying
for tells you whether a given plugin is giving you anything you could not already get.
What F(ilter)12 does
F(ilter)12 is a 12 bit sauce filter for Mac and Windows, $49, in AU, VST3 and standalone,
with DRUGS included free. The crush and the thing that controls the crush sit on one face,
which is the whole design argument.
CRUSH PAIR holds the two controls this article is about, stacked and
separate: SAMPLE RATE steps the rate down so the top goes and what was up
there folds back, and BIT coarsens the steps the wave is measured in so the
quiet detail rounds off and picks up an edge. Twelve bits is as clean as it gets. It only
goes down from there.
Behind the pair sits the filter, because a crusher without one is half a tool.
POSITION is the large knob, SLOPE sets how steeply it
falls, and DIRTY changes its manners. There are five
CUTOFF SHAPE options and six Q SHAPE options, with
DRIVE, RESO, Q and MIX
along the bottom of that section. AUTO FILTER and
SIDECHAIN put the filter under movement rather than under your hand;
auto filter covers what that is for.
Over the top sits AURA, with a MAX AURA switch next to
it, and a visualizer along the bottom that draws what the crush and the filter are doing to
the spectrum in real time. There is a DARK switch for the finish and a
BYPASS for the honest comparison, which, given everything above about
level-matched bypassing, is the control we would like you to use first.
Five people in a Discord, five plugin names, and none of them the answer. The answer was
two knobs and a filter, and knowing which one does which.
F(ilter)12 — a 12 bit sauce filter for Mac and Windows: a lo-fi section,
five filter shapes, six resonance shapes and AURA.
Hear it
Keep reading
- Bitcrushing explained — Bit depth, quantization noise, sample rate reduction and what 12-bit and 8-bit sound like.
- What is aliasing in audio — What it is, what it sounds like, how to prevent it, and how to use it on purpose.
- How to make a sample sound old — Narrow the range, add warmth and grain, wobble, noise and a small room.
- Best lofi plugins — The four jobs a lofi chain needs, and what to buy first.
- How to make lofi beats — Tempo, chords, swung drums, crush, noise, wobble and a gentle pump.